Add one more Egg design to your Easter nail art collection. Ready for egg hunt nail art?
We are making scenery this time instead of a design or a particular figure. It will be a little different for you. can play with it to make it more realistic or unique in your own way.
We are making a scene where there’s an egg is on the grass. You can make the design like it is or just as I mentioned, you can play with it. For example, you can make clouds or draw grass on the egg to make it look like it’s hidden or make two eggs side by side too. There are many different possibilities to do it.
also, check – easter bunny nail art design & easy easter nail arts

Available on Amazon
Complete started gel nail polish kit
Steps for Egg hunt nail design
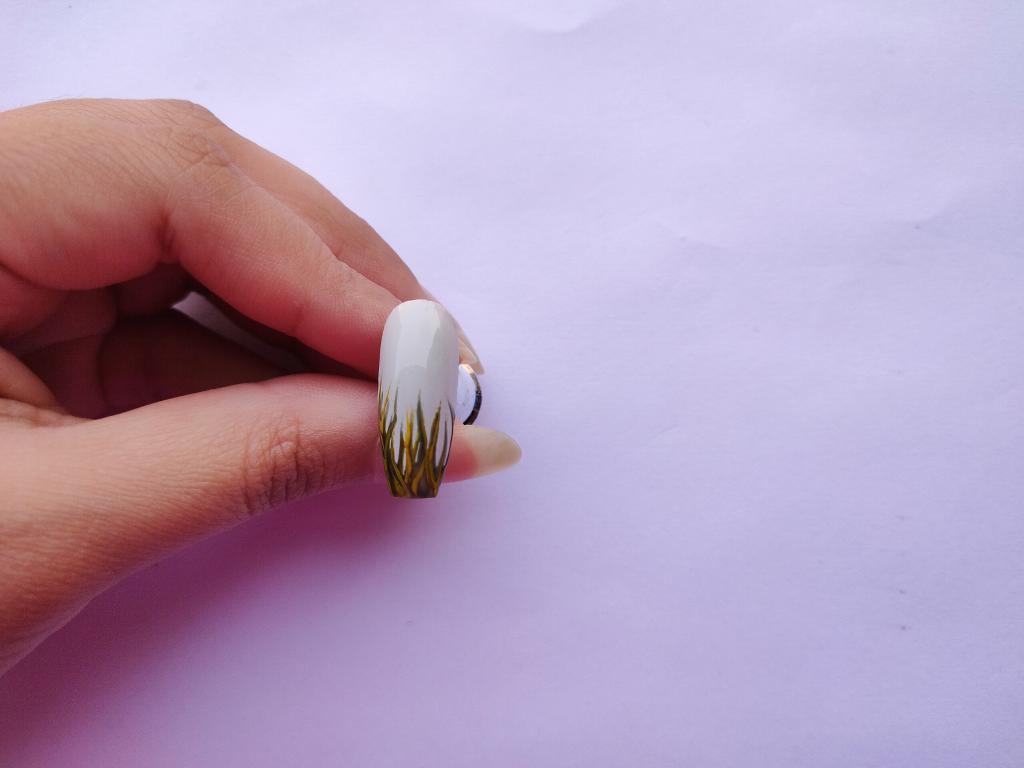
start with applying a light shade of polish as a background for the design because if you apply dark shade it won’t look good. Here, I applied the grey shade but you can apply white, light blue to make it look like a sky. Or use light pink to give a cute vibe to the design. But the base polish shade should be a light color.
1 make grasses
making grass is the easy part of the whole design, compared to the other things. For grass, I draw it with two shades of green to give it a more realistic look.
If you don’t have two shades of green you can simply add a little amount of yellow to the shade of dark green to make light green.
For drawing, take your thin brush and dip it in dark green. As always I’m using gel paints or gel polishes for design because they are easy to work with. And draw thin strokes from the tip of your nail. The strokes can be of any shade, straight or curly, as grass doesn’t have any specific shape.
With grass, you have to cover half of your nail so if you have long nails make the grass long and if you have medium or small length nails make it short.
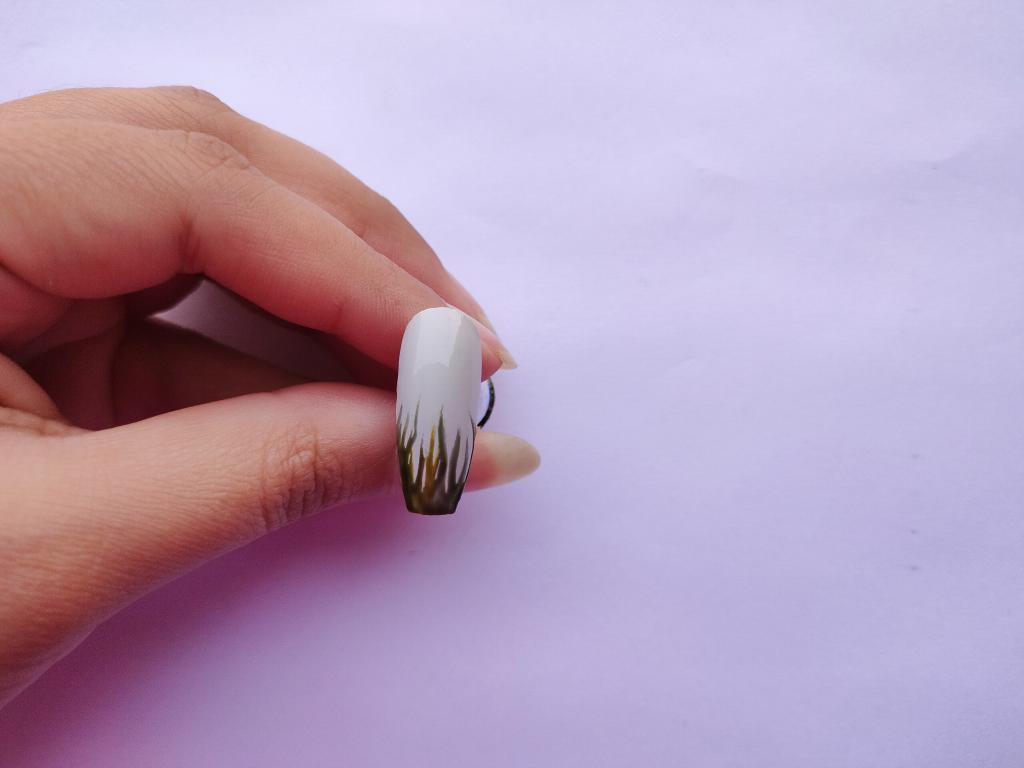
2 Detail the grasses
Now, let’s cure the gel paint. Then we will go with a lighter shade of gree for the grasses.
Dip the brush in light green or yellow gel paint and draw on top of dark green. It will give the grass a little shade to give the effect of dry grasses.
just randomly give a stroke of light shade. No need to follow any pattern just draw strokes here and there. You don’t have to be specific or anything.
Here, I did it with both light green and yellow. I thought the more color I give it, the more it looks good. But while doing it you have to keep in mind that you don’t overdo it. I mean that the dark shade has to be the most to show.
If you don’t have light green shade, take yellow and dark green shade you draw with earlier and mix them both to make a light green shade of your desire.
To make light shades you mostly mix white with dark shades. Mixing yellow instead of white gives the green color a more beautiful shade and it looks better or natural that way.
After that don’t forget to cure your gel again under the UV/led lamp.
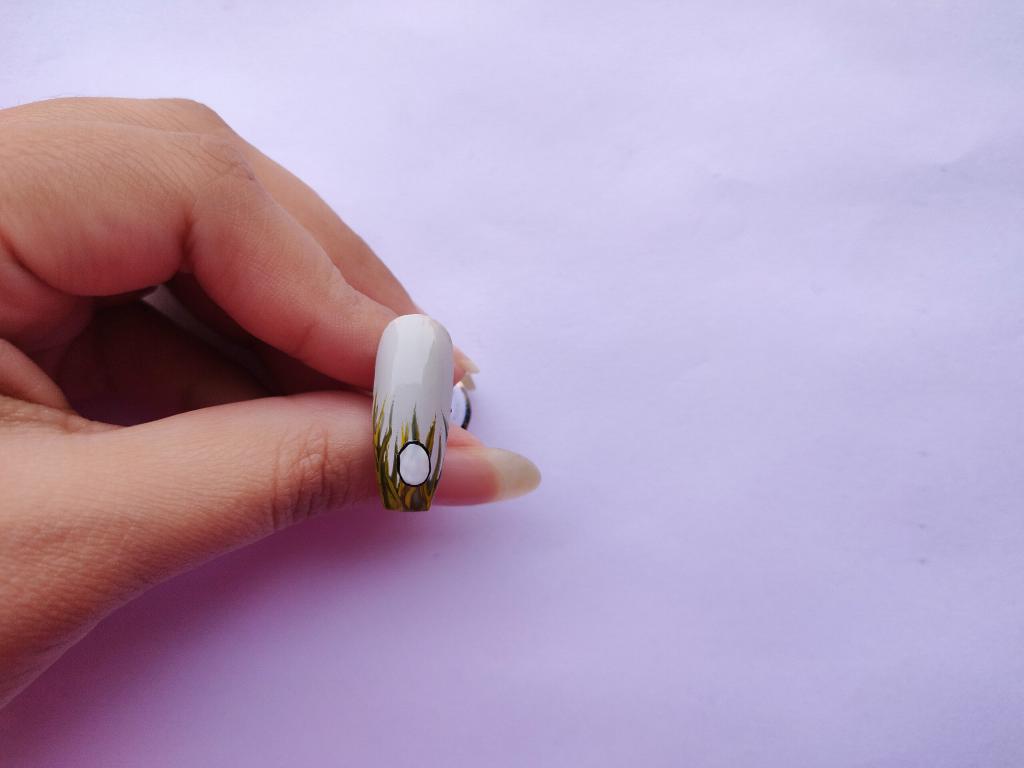
3 Make a big oval
clean your brush and take your white color gel paint for drawing the egg on top of the grass. You don’t have to so
For egg make an oval shape. Make it so that it will cover half of the grass so if you’re making the grass tall the egg has to be big and vise vera. This might seems to be tricky but actually it’s not.
Draw a simple oval and that’s it. You should practice making an oval shape before the final try if you are new.

4 Define the Egg
After you draw .the egg with white shade, cure the gel again under the lamp. This is an important step before moving further.
Now dip your brush in black gel paint and outline the egg. Try to outline the egg as thin as you can because a thick outline looks childish and unprofessional.
We outline the egg to make it pop more. I thought it will be more visible that way too and outlining the egg makes it look finished design.
At this step, it looks like a complete design. But still, in my view, there is something missing. I don’t want this simple egg, out egg must be extraordinary.
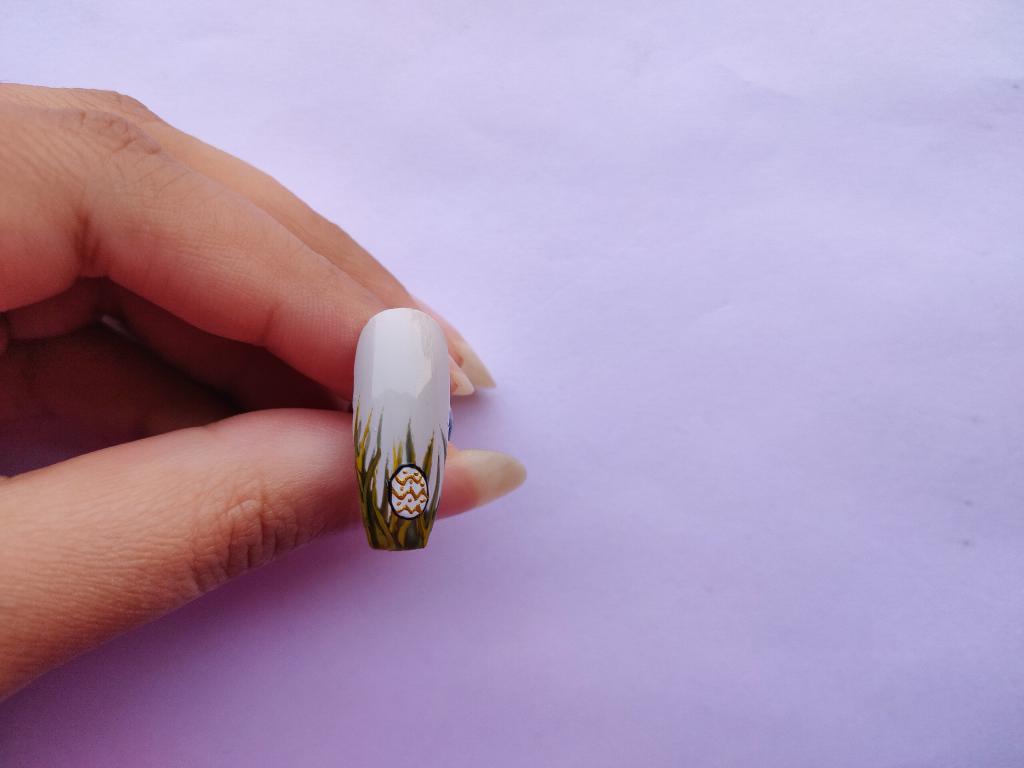
5 Decorate the Egg design
Now it’s time for a fun part. Time to decorate the egg, it’s totally your wish to how you want to decorate it. Make different patterns, straight, diagonal lines, with Zig Zag lines, with dots or some other way.
I make here zig Zag lines which is totally my preference. I always like them that way. It looks good and is very easy to make.
For Zig Zag, an easy way to do so is to make “v” side by side to make a line or “w”. That’s how I learned at my initial stage but obviously, that’s not how I still do it.
But if you find it tough you can practice it on paper then on the nails before your final try. Or you can draw the easiest pattern according to you.
After decorating the egg, do not forget to cure the gel again. And you’re finished with your cute egg hunt nail art design.
Tips:
you can make this design in all your fingernails the same or can do some changes. Change the decoration of the egg hunt nail designs or change of color shades.
You can make small clouds or a bird on the nail for a change, with white or black color respectively. Or you can make two eggs side by side for a change too.
Instead of making one single big egg, make it three. Make cute tiny three eggs on one of your nails to alter the design. This patter will give a more classic look.
Make the same design in four fingers and a little different on a ring fingernail.
That’s it guys, do try it out and do not forget to share your experience with me in the comment box. I’ll be waiting for your comment.