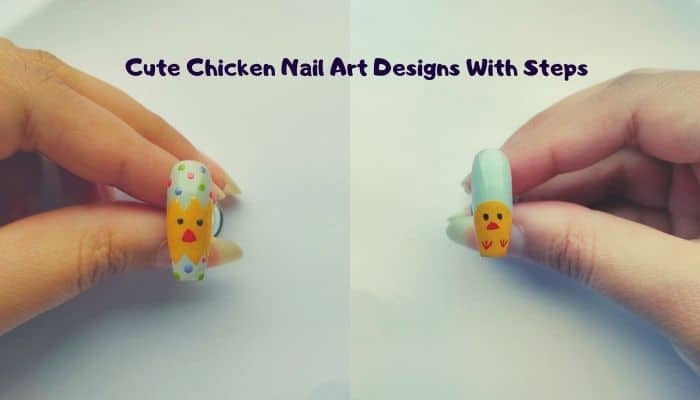
Chicken Nail Art looks really super cute on almost all types of nails. It suits the schoolgirl as well as an adult woman. You can create some really cute designs and do lots of variations with them. As you all know how much I love doing nail arts.
I have seen cute chicken nail designs and it totally looks amazing. Some make chickens beaks, chicken coming out of the eggs or even the whole body. I like all of them but the most important thing is how perfectly you create it.
Easter is almost here and I am sure you all have started preparing yourself for it. I am not talking about the decoration But about your look an makeup. I personally like a cute simple dress and makeup.
Having matching nails is what I love. Here I am sharing two easter chick nails are designs using the same colors. You can make both of them in single-hand or make whichever suits you the best.
Also, read my previous article on Snowman nail art.
Products used:-
1: base coat
2: holographic from meow cosmetics
3: no.2 yellow shade from ur sugar
4: “P102” gel paint from gel favour
5: “red” spider web gel from born pretty
6: A Liner brush
7: dotting tool
8: UV/led lamp from born pretty
9: topcoat
Chichen Nail art steps
1 start with the Preparation for Chicken Nail Art
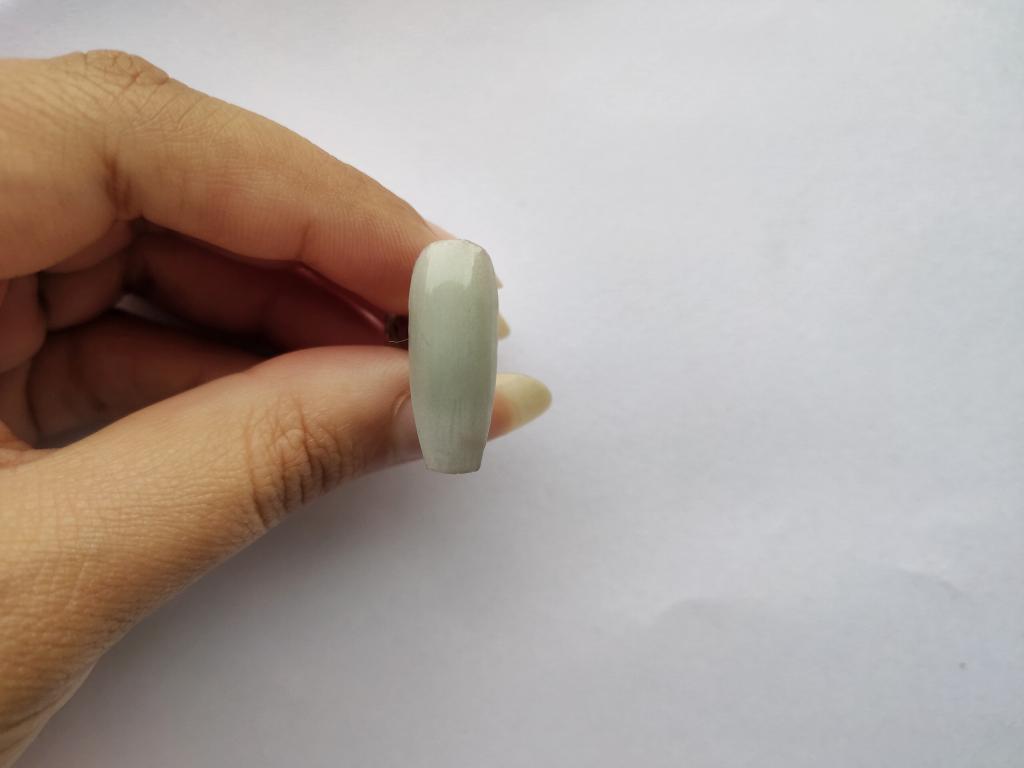
At first clean your nails with nail polish remover. It will remove any natural oil or any unwanted substance from your nails. Then apply a base coat on your nails to able to stick with your nail plate. It helps the design from chipping away easily.
Give your base coat enough time to dry. After its fully dries, apply the light color polish as a base polish. I applied grey holographic colored polish from meow cosmetics.
You can use white, light blue, light pink, or any light shade which doesn’t usually pop up. Use Your favorite color or color that suits you the best.
Before we start with the design, let me tell you the design shouldn’t have to be in the middle of your nail. The design is supposed to be on the tip of your nails.
2 Draw Half- Circle
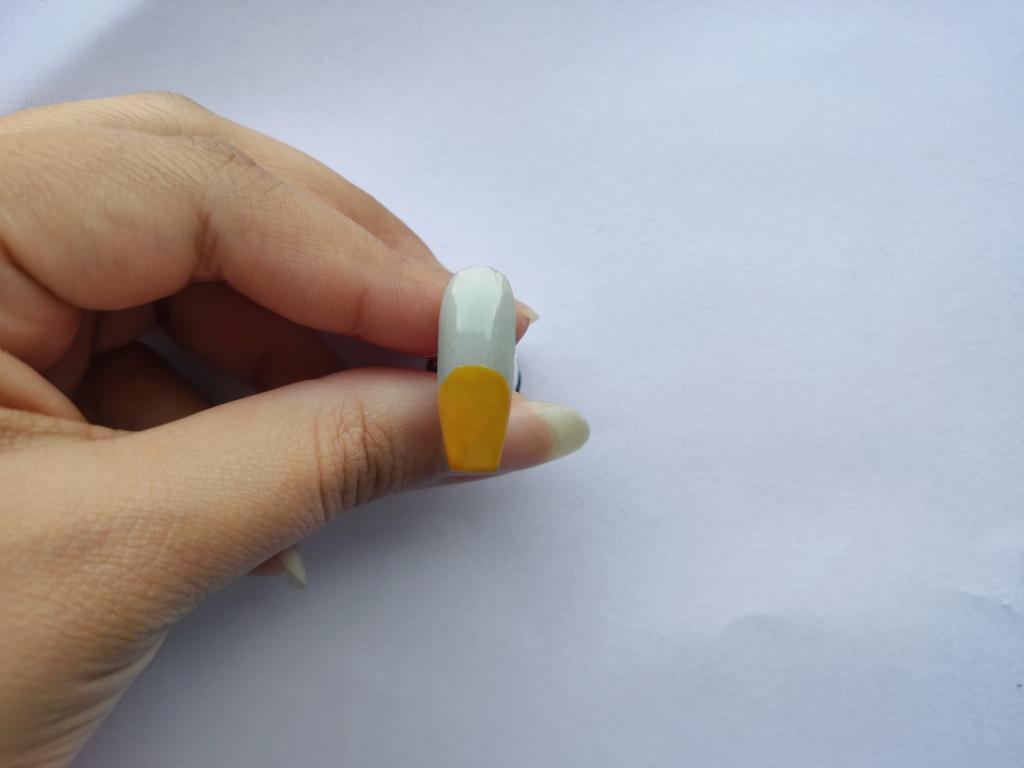
Take the yellow shade or mustard color gel polish or gel paint. We are making Yellow cute chick. Draw a half-circle on the tip of your nail.
Usually, we don’t draw with gel polishes because they are less opaque. The design won’t look good with them. But this gel polish from ur sugar is opaque in one coat so I make it with it and the design looks good too.
I use the mustard color gel polish so I cured it under a UV/led lamp. Curing it in “born pretty” lamp before moving further.
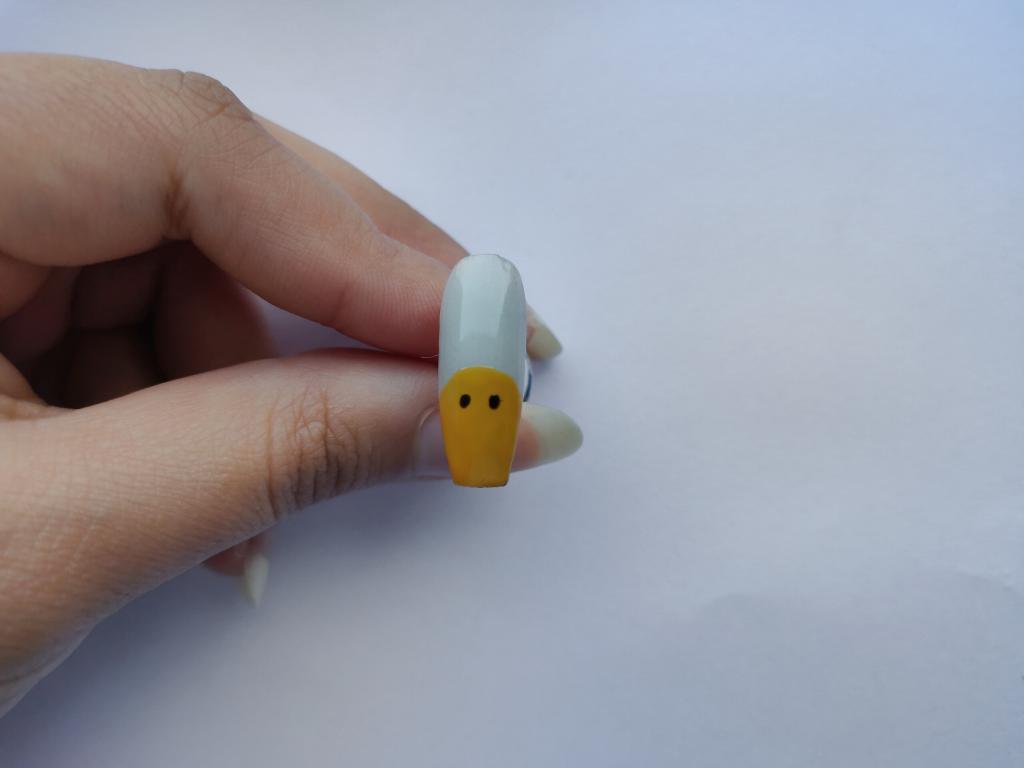
3 Make tiny Eyes
First, cure the get the make eyes. Place two dots with black gel paint with help from the dotting tool. Make the eyes a little close to each other.
You have to place the dots in straight. Make it as small as you can. Small eyes look cute on a small chick. Place it as I did, do not leave too much space between it.
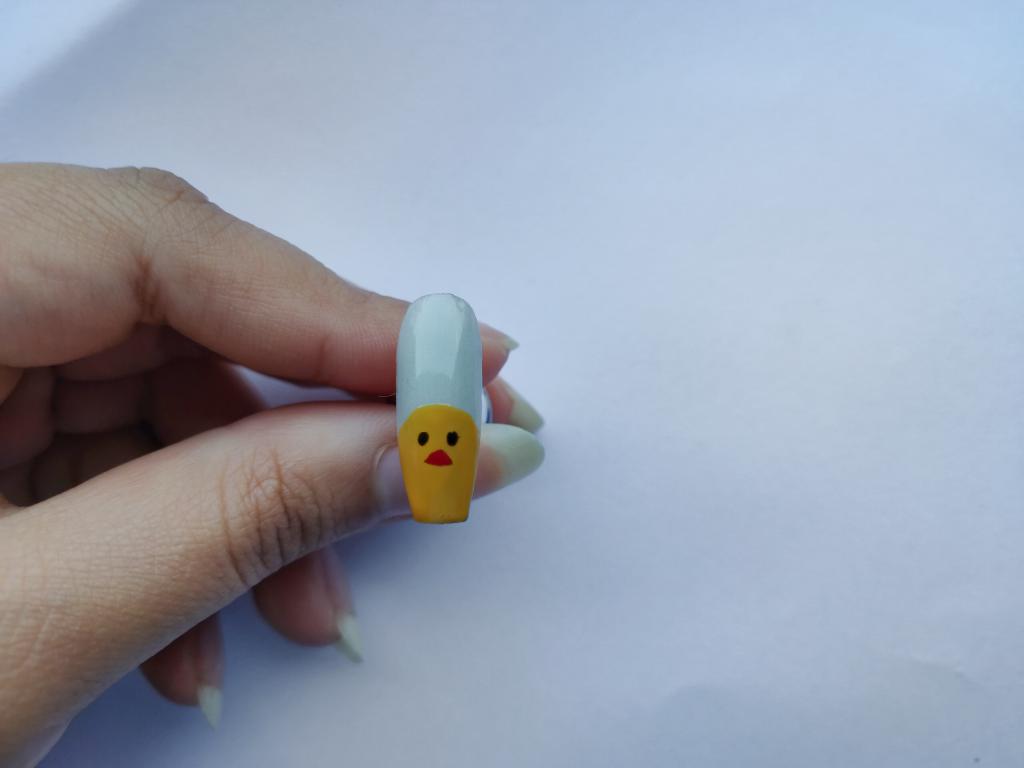
4 Make a tiny Beak
After the eyes, it’s time to make the beak and the claws of the chick. Make a triangle in the space between the eyes you make earlier.
After you make the triangle, don’t leave it like that. Start with rounding the sides and corners of the triangle. After you finish rounding the sides you’ll notice it looks more like a beam now than earlier.
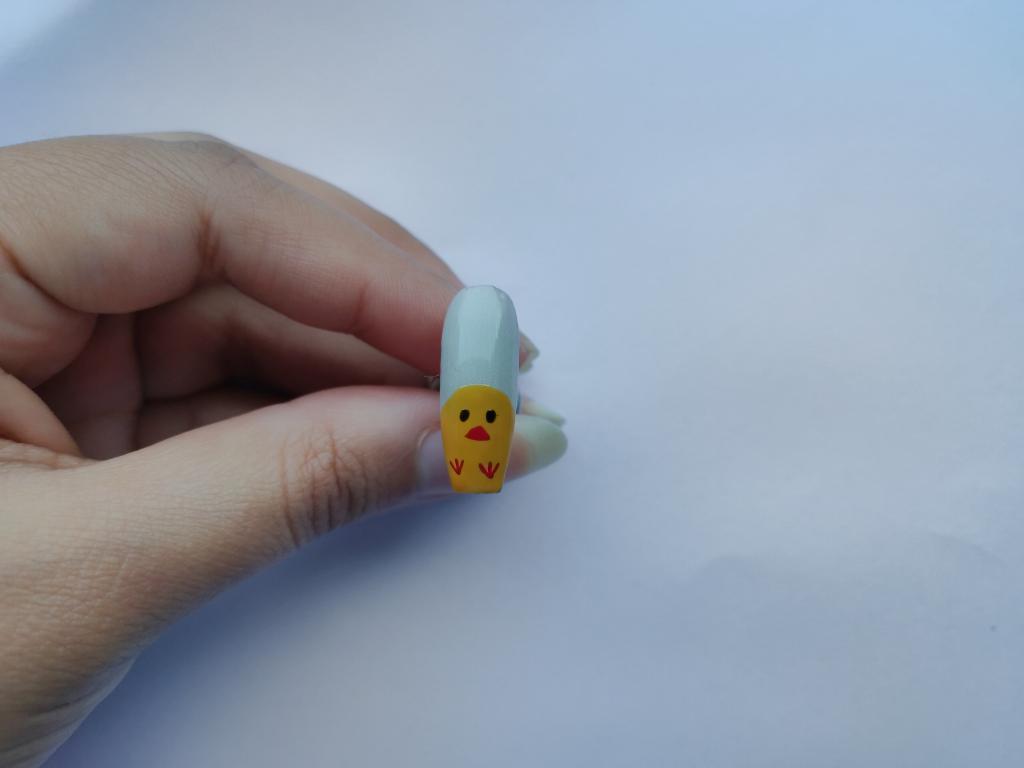
5 Time to make Claws of the chicken
For claws, first of all, make two dots. Place it where you want your both chicken claws to be. So that you’ll know if they look good or you need to shift them.
If you’re satisfied with the placement then make three lines touching the dot you make earlier. The lines should be thin and should not be supposed to touch each other. So take your time and make it perfect as you can.
It is really very easy to make you just have to make a “V”. Then draw a straight line in between. It looks so damn cute and is really easy to make too.
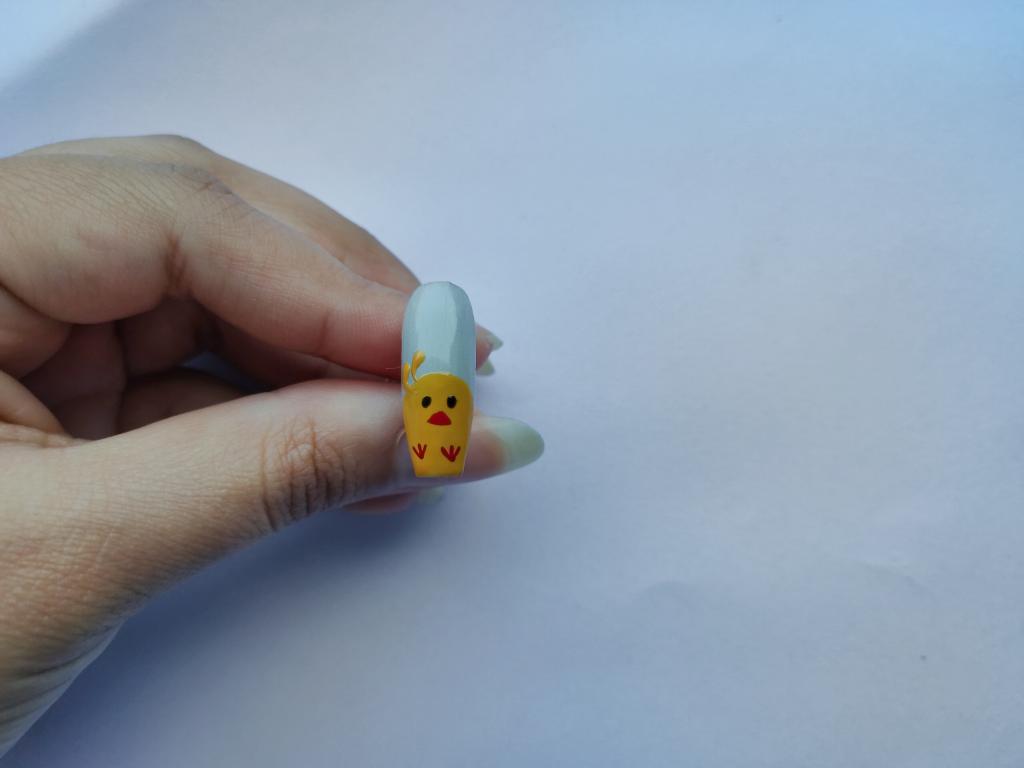
6 Feathers complete the Look
Only one thing is left which is the feathers on the head. Feather on the head of a baby hen is the most attractive and cutest thing. For feathers, dip your liner brush in the same color gel polish.
Use the same color that you have used for the body earlier. Make two “ ‘ “shapes just as two big apostrophes. It might sound funny but it is that much easy. Make one bigger than the other to give a little bit different in the design.
You made design with gel paints and gel polishes so it’s time to cure it. Cure your nails under UV/ led lamp. You don’t have to cure the gel after making eyes or claws separately.
As eyes, claws, and feathers are small details and aren’t touching each other. Cure them after making everything all together.
You Chicken nail art is ready and you are ready to go out for a party.
The gels don’t dry up on its own. It will not dry until you put them under the UV/ led lamp. So, take your time in drawing the design. Be careful while making so that you don’t mess it up.
And if it does not turn out as you wanted it to be, just clean it with a cotton ball soaked in nail polish remover. Do this before curing the gel and start with your design again.
After curing the design, don’t forget to topcoat the design. You can skip applying the topcoat but Keep in mind that it will stay for a longer time when you apply the topcoat.
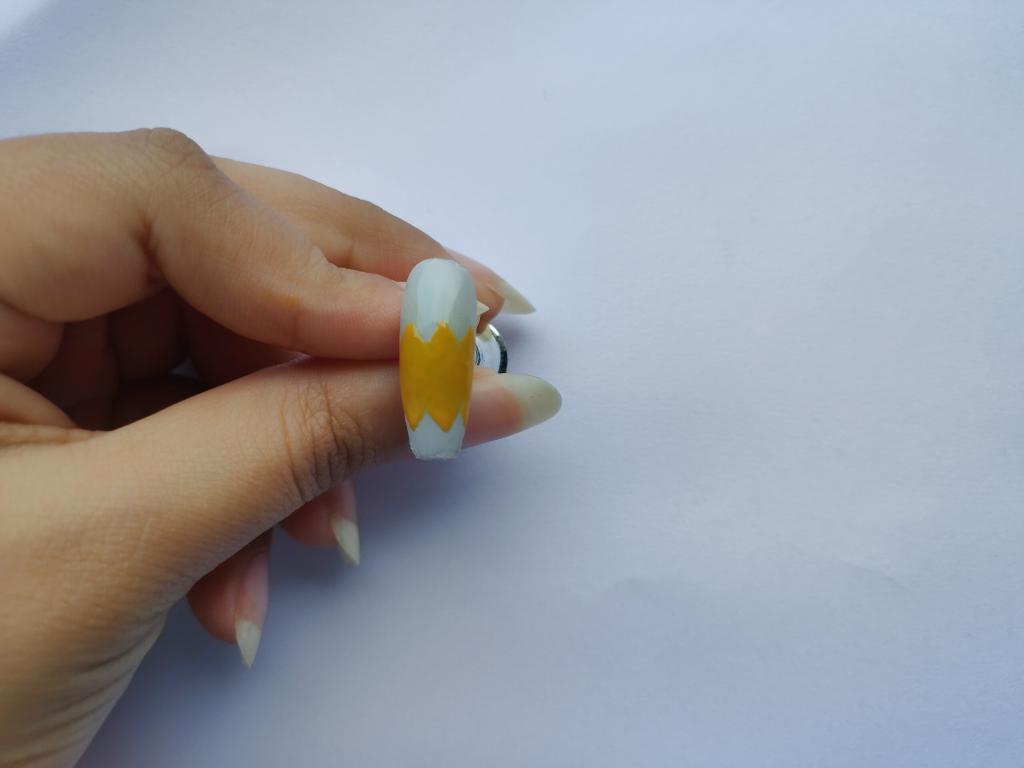
Chicken In the Egg Nail Art Designs Steps
1 Start with Base
Start again with a nice base coat and base polish. Here I am using the same base for the design. You can sure go for any of your favorite colors. It must be nice and even as you can see in the picture.

2 Make dots in Zig Zag Manner
Now use a small dotting tool and place some small dots on your nails. I am using the same yellow color you can use this too. Or just go for the one that suits you the best.
You have to place all the dots in a zig-zag manner as I did. The easiest way to make this is you place the dots in a line first. Make three-four dots, leaving space between them.
Now, make another line of dots beside the first one. But place them in such a manner that it looks like the dots are in front of empty space not in from of the dots of the first line. You can also imagine the placement of Olympic ring (if it helps you getting it done in the right way).
Make two zig-zag lines parallelly leaving sufficient space in between. You have to make a face of your chick here.
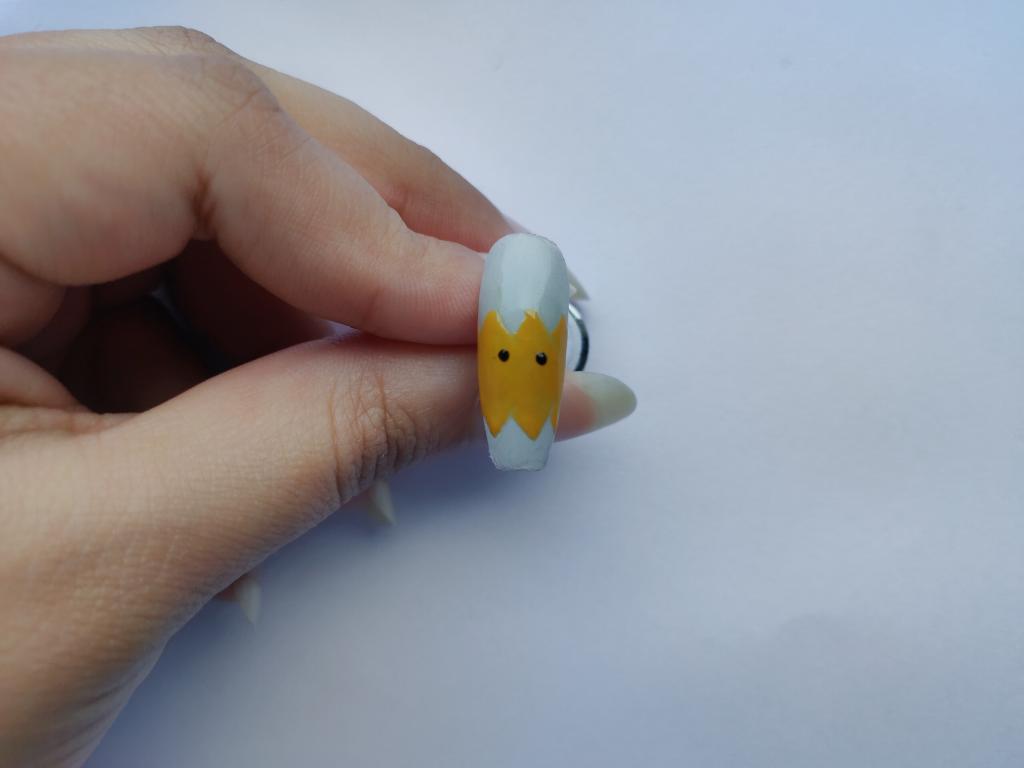
3 Fill it all
Join all the dots and make the two zig-zag lines visible. You the same yellow color to make lines. Now, fill the space between both the lines. Fill it properly with yellow color.
This is going to give a look of egg hatching. And it will appear like a chicken is peeping out of the hatching egg. I don’t know why- but I found this design looks the cutest.
4 Make eyes
Make two tiny dots for cute eyes of your chicken. Place both the dots in a straight as we usually do for eyes. I recommend you to use black color for this.
You can make the body of different colors also to give it a modern touch. But, the eyes should be black. I already have tried red, brown and many different colors for the eyes. And, came to the conclusion that Black makes it more attractive and beautiful.
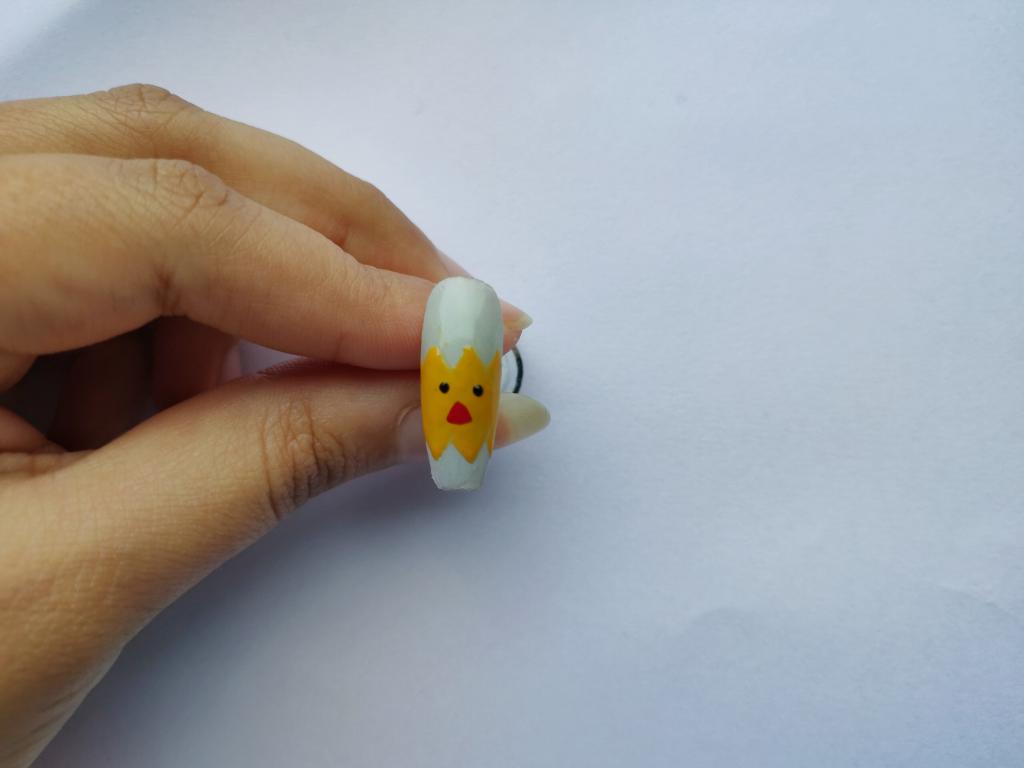
5 Make a Red Nose
Actually it looks like a nose but it is a beak. Chicken is a bird and birds don’t have a nose. Chick’s beak should be a tiny red triangle as shown in the picture.
You can do it the same way you did for the previous chicken nail art design. Make a triangle and place it in the middle of the design.
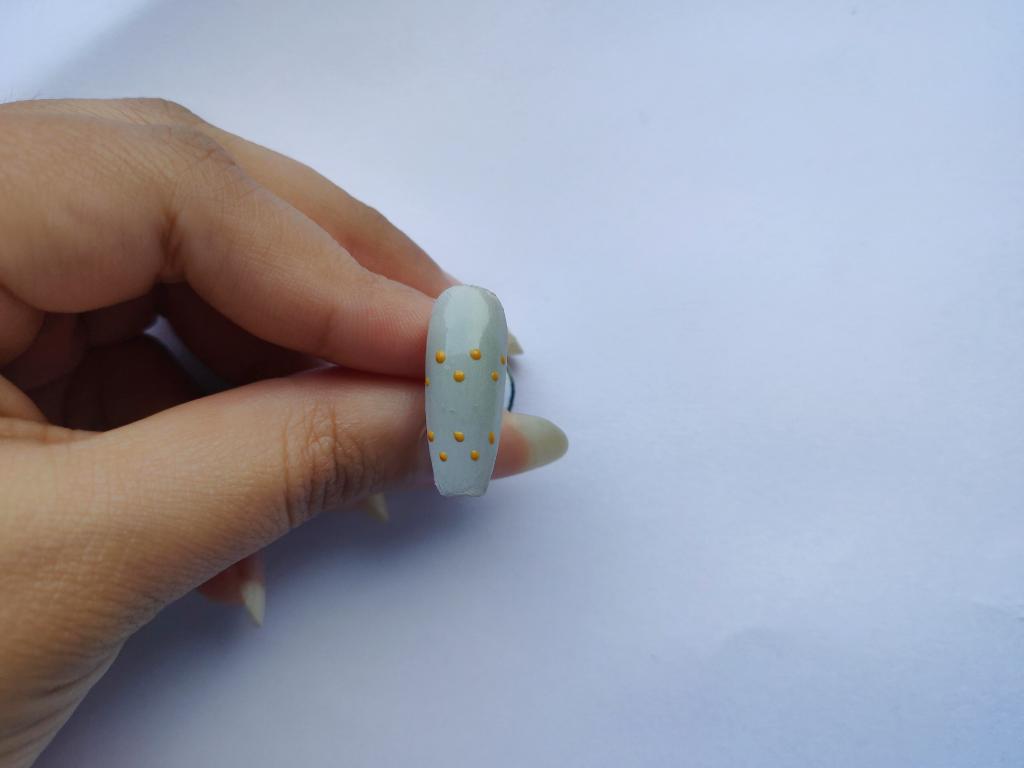
6 Fill the space with dots of Your Chicken Nail art
Now, this is my favorite part of the design. You have to empty space with colorful dots. You can do it as I did. Use as much color as you want.
Just keep in mind, the colors should be vibrant and complements the main design. Do not use contrast colors. If you will use dark colors for dots and light color for the main design, it will drive the attention more towards the dots.
You have to make the design more attractive.
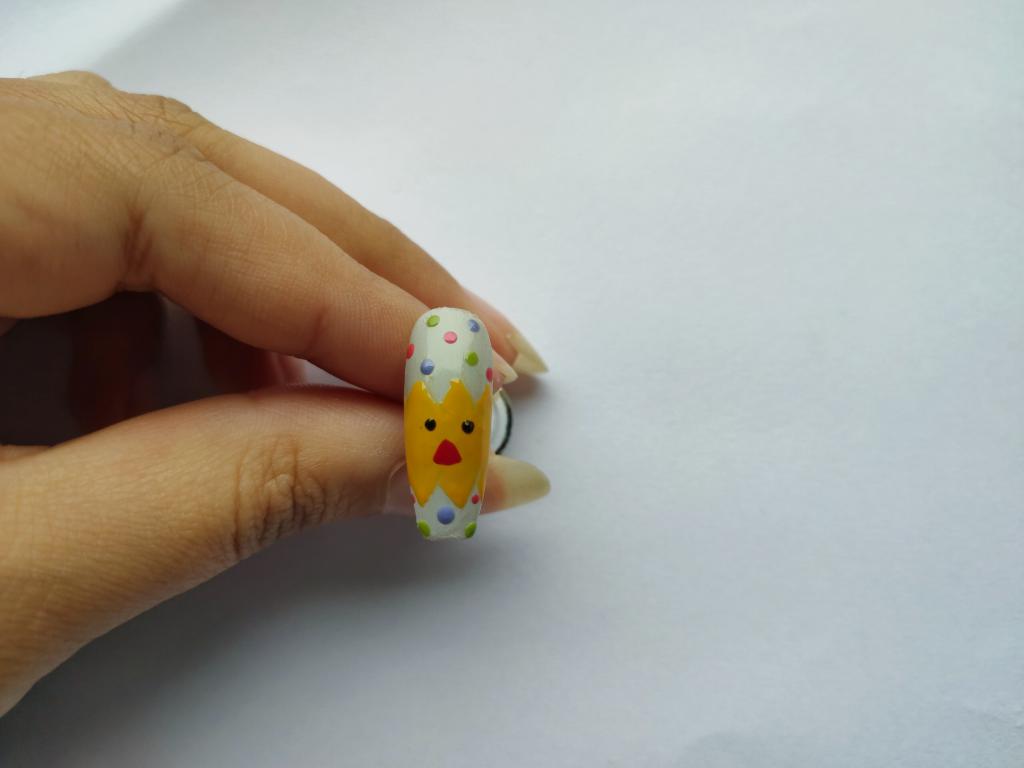
Your chicken in the egg nail art is complete now. See how cute it is. Do try these designs and let me know how it turns out. Drop your thoughts below in the comment box.