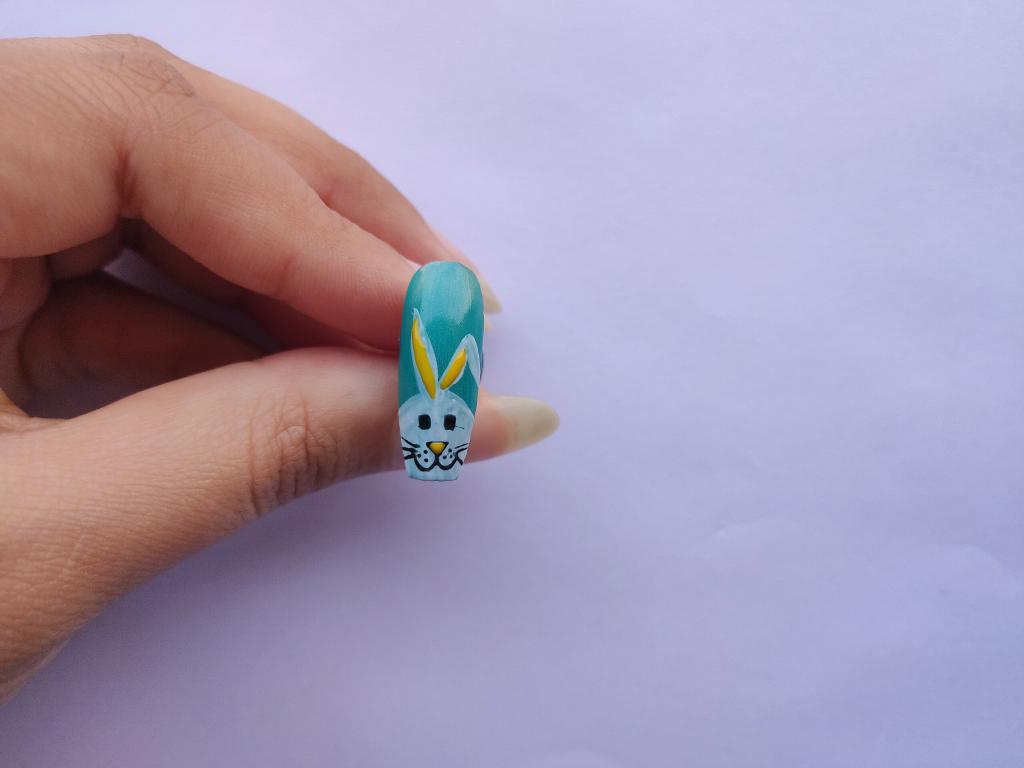
Cute Rabbit Easter Nail Art- Rabbits are the most common design for the Easter theme. It looks so cute and pretty not only when you draw them on your nails but also as an animal or as a decoration. It’s also a heartwarming sight to see them jumping from one place to another and see their happy dance.
They are just like a softball of happiness. I can’t say about everyone but I never get enough of them. Once I had some rabbits as a pet too and believe me it’s really a special feeling. Since then I started painting rabbits on my nails.
For the Easter theme, rabbits are the best choice of design to make on your nails. They are just so cute to look and they are easy to make too. The white color rabbits are the most pretty choice. White is a traditional shade for a rabbit design.
Also, check out – easy Bunny nail art, Easter egg nail designs And Chicken nail art steps
Without further delay let’s hop on to the instructions on how to make the design.
DIY Cute Rabbit Easter Nail Art Steps
Mostly for these Easter designs, I suggest to always use Patel shades or light shades as a base polish for the design to look cute and beautiful. You can do the ombre as a base for the design too.
- To make the design, I use gels and not acrylic paint. But you can always use gels or acrylics according to your comfort.
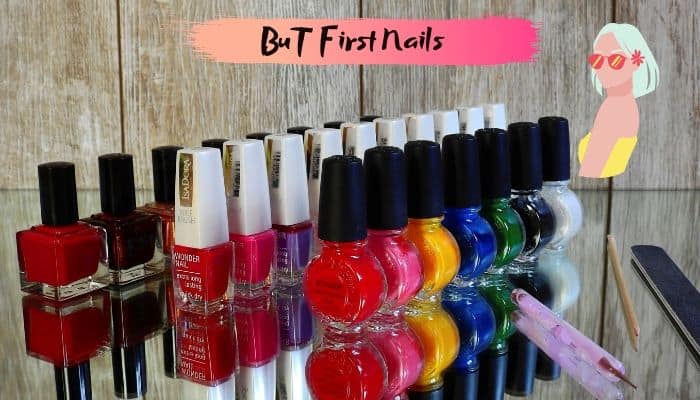
1: Draw a Half circle
Start by making a half-circle on the tip of your nail with white color gel paint. We are making the head of the rabbit. So if you like brown Rabbits, you can draw with brown color too. Or mixing both the shades half and half.
Draw a semicircle and fill it with the paint. This is going to be the face of your rabbit. You should do it neatly and fill it as I did.
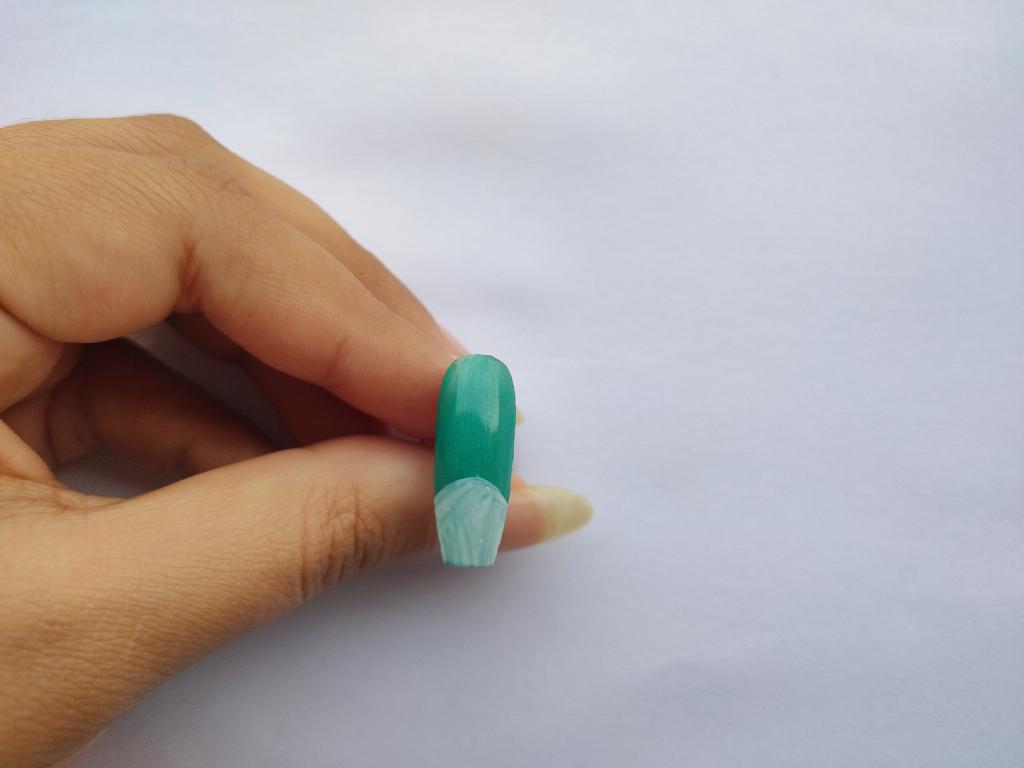
2: Make Ears
After the head part, draw the ears of a rabbit. The ears should be equal to the height of the head or longer. Because if you notice the ears on rabbits they are always long. So we are doing the same thing and drawing them long.
With ears, you can make them both straights or one bend like I did. I advise you to draw both of them in different ways to give a real touch to the design. If you draw them exactly the same and both straight up then it won’t look as if it’s hand-drawn.
I always try to give my designs a little touch of my idea or my point of view. To make it look more realistic. You can bend any of the ears to any side no need to do exact same.

3: Detail Your Design with Eyes and Nose
After drawing the ears and the head, the base as a rabbit is complete. From this point on we will be proceeding with the detailing parts. Parts like eyes, nose, mouth, insides of rabbit ears and the out-lining.
I started drawing eyes and nose. For doing it a little differently I make the eyes in a square shape rather than making them round. You can make them round too or in an oval shape.
For eyes, you can choose any one of all the three shapes. So here I chose the square shape.
Then draw a small triangle in between the space below the eyes you have drawn earlier. The size of both eyes and nose should be equal. Make the nose in a triangle shape as you see the nose of (mostly) every rabbit is shaped that way.
4: Make it a Smiley Rabbit
Now it’s time to make the mouth for the rabbit. For that I make the common mouth shape. You will find it on the bear face, cat face, or any other animals too.
It’s quite easy to draw and it looks good too. So I thought it will be fun to draw that mouth here. Or you have to draw a ”w” shape by attaching it with the nose you made earlier.
It’s quite easy to draw but you might get a little bit of trouble while making it. You need to be flexible with your brush to give those around curves. But I would say it’s just your thinking and it’s not that hard at all. Just take a deep breath before and start drawing them. It will come out well if you’ll have confidence in yourself.
5: Whiskers are must
Who likes whiskers? I do.. so I thought to give my rabbit one too. It will Make your rabbit cute. So we have to do some detailing as much as we can.
For whiskers just draw three straight lines from touching the mouth you made earlier. This is the easiest part isn’t it? We all have done this in our childhood while drawing cat or mice.

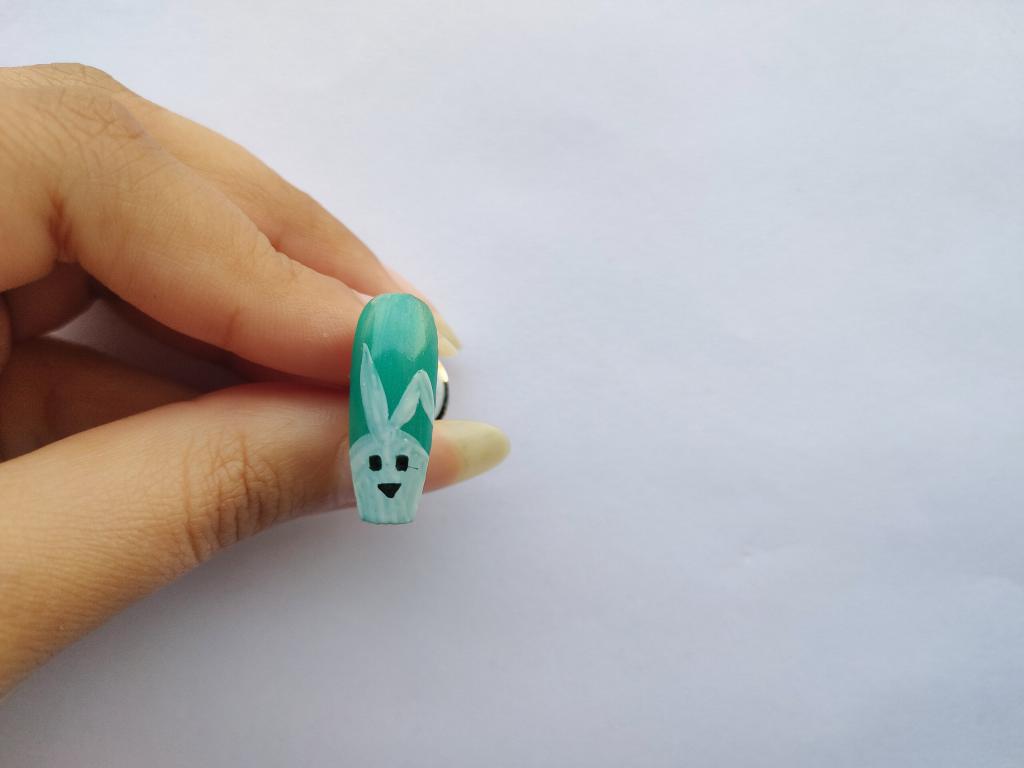
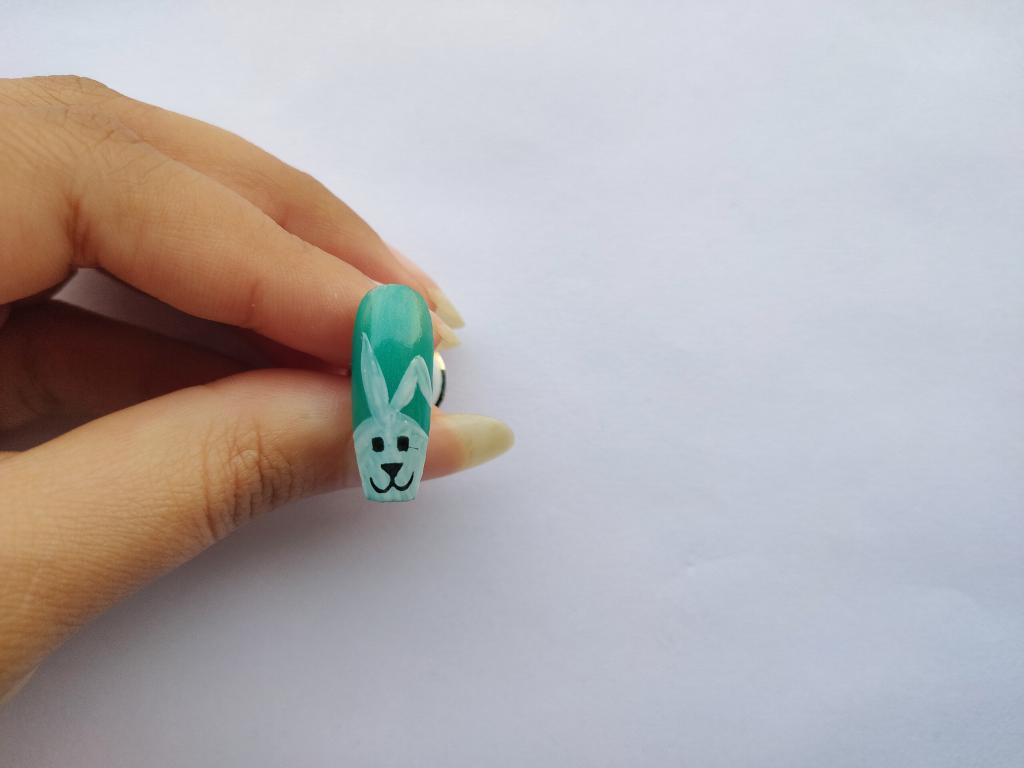
6: Fill Colors to your Easter Rabbit Nail art
It’s time for the next step in the process of giving our rabbit some colors. Till now we have made it with white and giving him details with black only.
Also, we have to fill the inside of rabbit ears and usually, it’s of baby pink color. But we’ll do it a bit differently. This is because it’s always fun to try new stuff. How will you know it’s good until you try it right?
So!! Instead of using pink, I use the yellow color for the rabbit. Take your liner brush and dip it in yellow color and fill the inside of rabbit ears and the nose to give a little bit color.
If you make one ear folded than try to be careful with filling it. You don’t want it to fill the other way around.
I think you can use any shade until it’s a bright shade, like the yellow I use or light pink, light green, light purple, light orange will also look good too.
7: Outline Rabbit Easter Nail art Design
Here we are on the point where the rabbit is almost complete. The only thing which is left is to outline the rabbit with the black color. I usually do it cause it pops up the design better. Outline shows a more finish look to your design. But the one thing you should keep in mind is that the out-lining have to be thin and have to be even.
If the outline is thick and not even it will ruin the design no matter how good you make it. So do it with your steady and slow hand. And you are done with the Cute Rabbit Easter Nail Art 😋
This is all for today. Hope you liked it. Try the design and don’t forget to let me know in the comment box.