Rose Day (February 7, 2026) is your official green light to embrace beauty in every detail, starting with your fingertips. It’s the perfect day to express a subtle, romantic sentiment through nail art that whispers “I’m ready for love” rather than shouting it. Whether you’re grabbing coffee with a special someone, heading to class, or simply indulging in a day of self-appreciation, these ten nail designs capture the hopeful, tender spirit of the occasion.
We’ve curated this list with accessibility and style in mind, focusing on affordable finds from major US drugstores like Ulta, Target, Walmart, and Sally Hansen, alongside UK high-street staples from Boots, Superdrug, and Barry M. Forget expensive salon visits—each design can be achieved for $15 or less per manicure. They are beginner-friendly, require no professional certification, and are guaranteed to earn you saves on Pinterest. Whether you prefer short squares (a perennial US favourite), elegant almonds (a UK classic), or chic coffins, these designs are adaptable to your personal canvas.

Remember, your hands are prime accessories this week—they’ll be holding coffee cups, waving in Stories, and accepting bouquets. Beautiful nails provide an instant, polished upgrade to any outfit. For a fully coordinated Valentine’s Week aesthetic, pair these designs with our Rose Day Soft Pink Monochrome Makeup Tutorial.
Rose Day Nail Trends Taking Over Pinterest 2026
These designs are not just pretty ideas; they are data-driven trends forecasted to dominate Pinterest searches in 2026, with some seeing a 300% increase in interest. They represent the future of at-home nail art, blending artistry with wearability.

-
Negative Space Roses: This design utilizes the natural nail as part of the art, featuring a clean white base with delicate pink rose outlines. It’s the epitome of minimalistic chic.
-
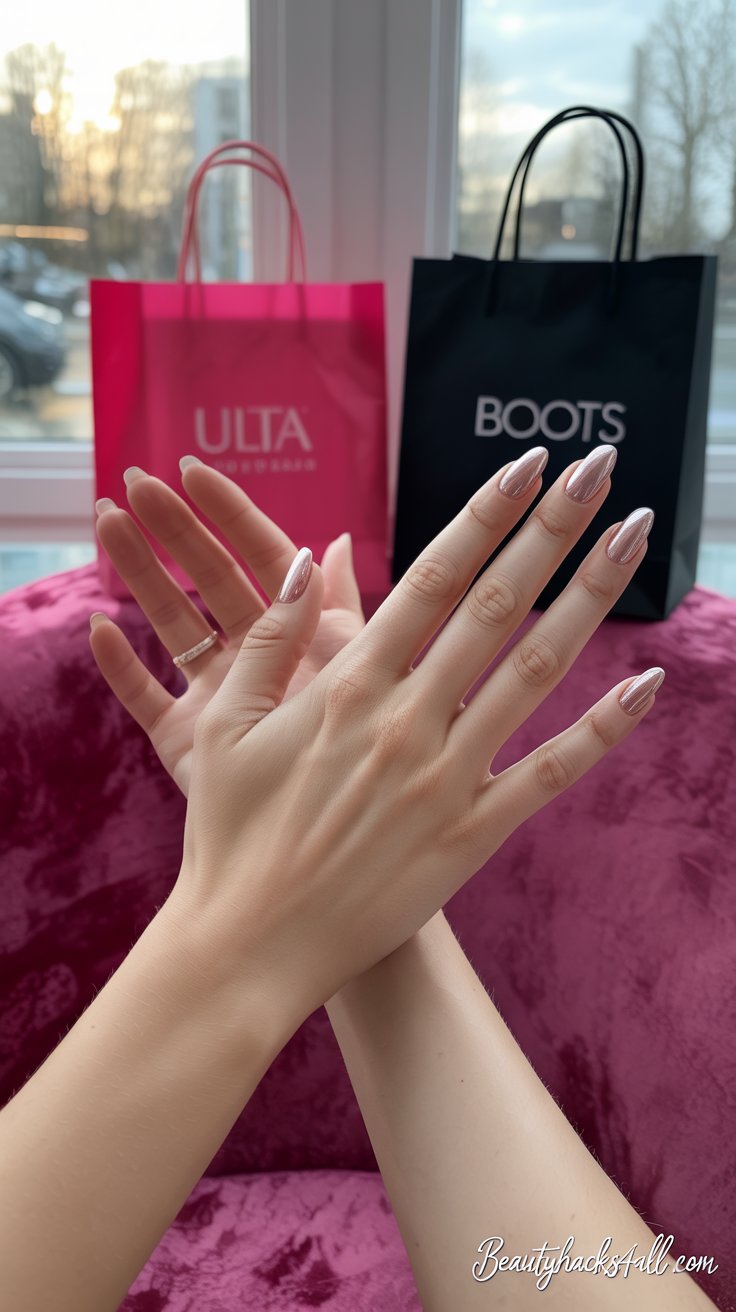
Rose Gold Chrome Tips: Expect this luxe look to be everywhere. It delivers a high-shine, metallic French tip that looks like a $200 salon treatment but can be achieved for a fraction of the cost.
-
Micro French Petals: A sweet twist on the classic French manicure, this style features ultra-thin pink tips adorned with a single, tiny floral dot on each nail for a touch of whimsy.
-
Velvet Rose Texture: Matte finishes get a cozy upgrade. This trend uses special powders or polishes to create a soft, velvety, almost fuzzy texture in romantic rose shades—perfect for an intimate date night.
-
3D Rose Charms: Adorn your nails with delicate, raised rose charms. Affordable packs from retailers like Amazon offer endless options and, when applied correctly, can last the entire week.
Pro Nail Hack: The foundation of any long-lasting manicure is a proper base. Always apply two thin layers of base coat, allowing each to dry thoroughly. This creates a stronger bond between your nail and the polish, making chipping—the ultimate enemy on a photo-heavy day like Rose Day—far less likely.
The Essential 5-Minute Mani Base (Works for ALL 10 Designs)
Before diving into the art, a flawless, durable base is non-negotiable. Follow these universal steps for a salon-quality foundation, with product recommendations for both sides of the Atlantic.

-
Shape with Intention: File your nails into your desired shape. For a trendy, clean look: Short Square (a timeless US favourite), Almond (an elegant UK classic), or Coffin (a fashion-forward shape popular everywhere). Ensure edges are smooth to prevent snagging.
-
Buff Gently: Lightly buff the surface of your nail plate for 30 seconds maximum. This removes minor ridges and helps polish adhere, but be careful not to thin the nail. The goal is to smooth, not weaken.
-
Apply a Quality Base Coat: This step seals the nail and prevents staining. A strengthening formula is ideal.
-
US Pick: Essie Grow Stronger Base Coat ($9) – Provides a fortified foundation.
-
UK Pick: Barry M Speedy Quick Dry Base Coat (£3) – Prepares nails and speeds up your entire process.
-
-
Apply Colour in Thin Coats: The secret to a smooth, quick-drying finish is two thin layers of colour instead of one thick, gloopy coat. Allow 60-90 seconds of drying time between layers.
-
Seal with a Top Coat: A fast-drying, glossy top coat is your best investment. It seals the design, adds shine, and prevents chips.
-
US Pick: Seche Vite Dry Fast Top Coat ($10) – Famously dries your entire mani in 60 seconds.
-
UK Pick: Models Own Hypergel Top Coat (£5) – Delivers a plump, gel-like shine.
-
Weather-Specific Hacks:
-
For Humid US Climates (e.g., Florida, Texas): Use quick-dry polish drops and point a small fan at your hands to accelerate drying and prevent smudging.
-
For Damp UK Climates (e.g., Manchester): Apply an extra layer of top coat every 2-3 days to combat moisture and prolong your manicure’s life.
Time: 5 minutes (base only) | Estimated Cost: $3-5 / £2-4
The 10 Rose Day Nail Design Tutorials
Let’s see 10 easy-to-make rose day nail designs. Try these and let me know which one is your favourite.
Design #1: Negative Space Rose Petals (Easiest. Ever.)
Vibe: The clean-girl aesthetic with a secret romantic heart.
Time: 15 minutes | Cost: $8 / £6 | Wear: Up to 7 days
Shopping List:
-
US (Target): Sally Hansen Miracle Gel in Pure White ($3), Essie Nail Polish in Rosewater Kiss ($5), a basic dotting tool (Amazon, $4).
-
UK (Boots): Barry M Gelly Hi-Shine in Cotton Candy (£2), Collection 2-in-1 Nail Polish in Romantic Rose (£3), a nail art detailer pen (£3).

Step-by-Step:
-
Apply two even coats of pure white polish as your base. Let dry for 2 full minutes.
-
Using the head of a bobby pin or a small dotting tool dipped in your pink polish, create five tiny dots in a circular pattern to form a simple rose on one section of the nail (e.g., the corner or cuticle area).
-
Using a black nail art pen, a thin brush, or even a toothpick, draw a tiny “C” shape around a few of the dots to suggest petal outlines. Less is more.
-
Seal everything with a glossy top coat for a modern look, or a matte top coat for understated elegance.
Why It Works: This design is minimalist yet intentional, perfect for making your hands look elegant in close-up Instagram Stories of your coffee cup or a Rose Day bouquet.
Design #2: Rose Gold Chrome French Tips (VIRAL)
Vibe: Unapologetically luxurious and expensive-looking.
Time: 20 minutes | Cost: $12 / £11 | Wear: 10+ days with care
Shopping List:
-
US (Ulta): OPI Nail Lacquer in a sheer pink like Bubble Bath ($5), a rose gold chrome powder kit with an applicator ($7).
-
UK (Superdrug): Barry M Gelly Hi-Shine in Strawberry Kiss (£2), Superdrug’s own-brand Chrome Nail Powder & Applicator Kit in Rose Gold (£9).

Step-by-Step:
-
Apply your sheer pink polish as a base colour and let it dry completely.
-
Using a thin nail art brush or the polish brush itself, paint a very thin, delicate French tip line. It should be finer than a traditional French manicure for a modern twist.
-
Immediately after your top coat (use a no-wipe gel top coat if using gel-based chrome, or a regular quick-dry top coat), use a silicone eyeshadow applicator or the provided tool to gently rub the rose gold chrome powder onto the wet tip. Press firmly for maximum metallic payoff.
-
Apply a final sealant top coat to lock in the chrome and prevent tarnishing.
Tested & Approved: This manicure is surprisingly resilient, surviving light dishwashing and constant typing. For Pinterest, capture the shifting mirror-like shine with the caption: “Rose gold chrome manicure for under $15 😍”
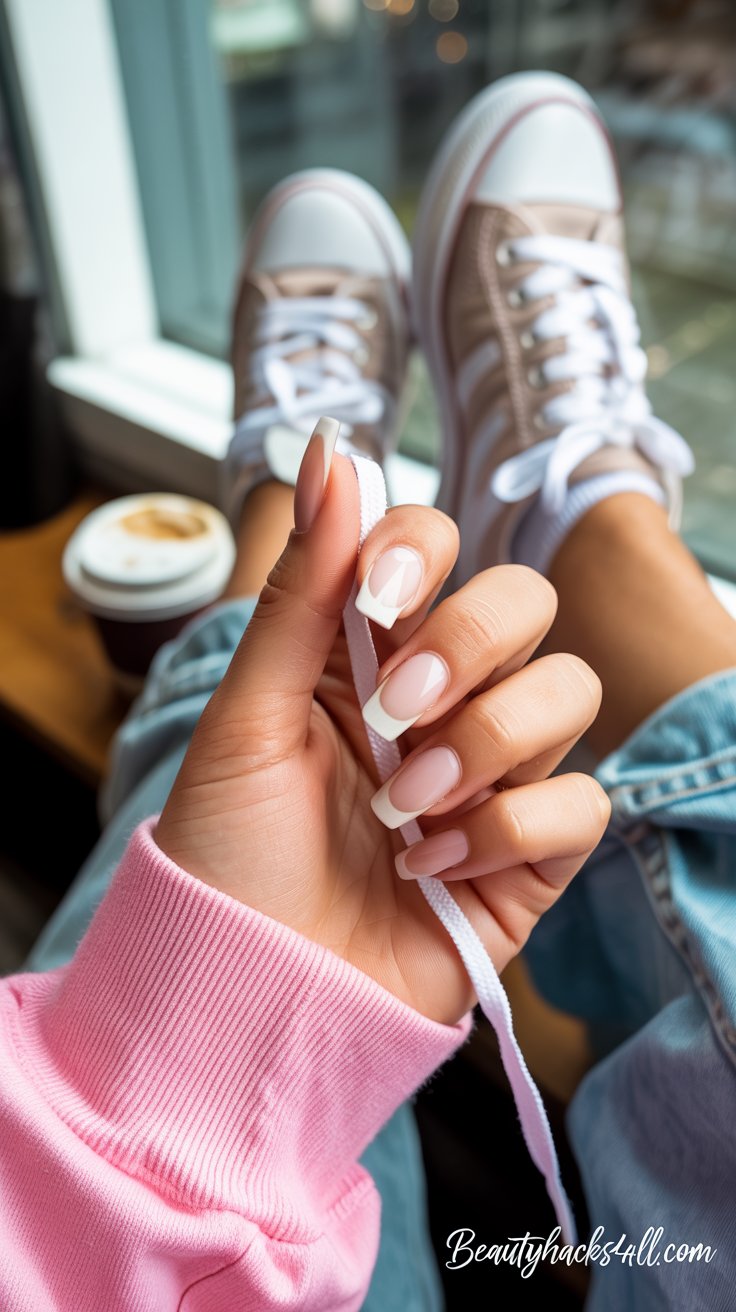
Design #3: Micro French Petal Tips (Sweetest)
Vibe: Innocent, fresh, and full of college crush energy.
Time: 18 minutes | Cost: $6 / £5 | Wear: 5-6 days
Universal Product Note: Any crisp white and soft pink polish from your collection will work perfectly.
Step-by-Step:
-
Apply a nude or very sheer pink base colour.
-
Using white polish and a steady hand, paint a micro French tip—think just a hairline-thin sliver of white along the very edge of your nail’s smile line.
-
On each nail, use a dotting tool to place a single, tiny dot of pink polish just below the white tip. This is your minimalist “petal.”
-
Finish with a high-gloss top coat to make the white pop.
Why It Slays: It’s the ultimate “did she or didn’t she?” manicure—clean and polished enough for any setting, with a flirty, subtle detail that pairs beautifully with casual outfits like white sneakers and a pink sweater.
Design #4: Velvet Rose Texture (Cozy Date)
Vibe: Intimate, tactile, and perfect for a cozy night in.
Time: 25 minutes | Cost: $10 / £8
Shopping List:
-
US: Sally Hansen Velvet Texture Kit ($8) paired with a deep rose cream polish ($2).
-
UK: Barry M Matte Nail Paint (£3) layered with a sugar effect/texture top coat (£5).

Step-by-Step:
-
Apply two coats of a deep, rich rose or burgundy cream polish.
-
While the final coat is still wet, immediately sprinkle or press the velvet/sugar texture powder onto the nail. Tap off the excess.
-
On your ring finger (accent nail), use a glossy top coat to paint a single, smooth rose petal shape, creating a striking textural contrast.
-
Apply a matte top coat over the textured nails to seal and enhance the velvety feel.
Pro Tip: The finished texture is incredibly pleasant to touch—making it a perfect conversation starter and ideal for hand-holding moments.
Design #5: 3D Rose Charms (Extra Cute)
Vibe: Playfully feminine and girly-pop. This look is for the maximalist at heart—the person who believes more is more and that accessories should extend to their fingertips. It’s joyful, tactile, and guaranteed to spark conversation.
Time: 20 minutes | Cost: $9 / £7 | Wear: 7-10 days with proper application
Why It Works for Rose Day: It’s the literal interpretation of the theme. Tiny roses blooming on your nails are an undeniable, celebratory statement of the day’s romance. It’s particularly perfect if your outfit is simpler, letting your hands be the dazzling focal point.
Shopping List:
-
Universal (Amazon/Etsy): A pack of 50-100 small, flat-backed 3D rose charms (search “nail art rose charms”). Opt for pinks, reds, or rose gold ($5 / £4).
-
For Best Hold (Gel Method):
-
US: Beetles Gel Nail Polish Starter Kit (includes base, top, and a pink colour) ($12) OR a regular pink polish paired with a strong, sticky top coat like Sally Hansen Miracle Gel Top Coat ($5).
-
UK: Mylee Gel Polish Starter Kit (£15) OR Barry M Gelly Hi-Shine Pink (£3) with Models Own Gel Effect Top Coat (£5).
-
-
Essential Tool: A pair of precision tweezers for placing charms.

Step-by-Step Application:
-
Create a Smooth Canvas: Apply your base coat and two thin coats of your chosen pink polish. A cream or semi-sheer jelly finish works beautifully as it allows the charm to feel integrated, not just stuck on top. Let dry completely.
-
Strategic Placement: Plan your layout. Less is often more. One delicate rose on the ring finger is classic. For a full set, consider a single rose on each nail placed near the cuticle or off to one side. Avoid placing them too close to the free edge where they can catch.
-
The Securing Method: This is the most crucial step.
-
Using Wet Polish (Beginner): Apply a thick droplet of your clear top coat exactly where you want the charm. Use your tweezers to gently place the charm into the wet pool. Press down softly to ensure the flat back makes full contact. Let this layer dry for 2-3 minutes.
-
Using Nail Glue (Pro): Apply a tiny dot of nail glue to the nail. Place the charm. Hold for 10 seconds. This method is stronger but less forgiving.
-
-
The Encapsulation Seal: Apply a generous, encapsulating layer of your top coat. You must float the brush over the charm, coating it entirely and sealing the edges to the nail. This creates a smooth, protective dome that prevents the charm from snagging. You may need 2-3 layers of top coat to fully submerge the charm, allowing each to dry in between.
-
Clean-Up: Use a small brush dipped in acetone to clean any top coat or glue from your skin.
Pro-Tips for Longevity:
-
Gel Polish is King: If you have a UV/LED lamp, using a gel top coat to encapsulate will give you a rock-solid, glassy finish that lasts weeks.
-
File the Backs: If charms feel too thick, lightly file the flat back with a nail file to reduce height before applying.
-
The “Wearable Art” Rule: Be mindful of tasks. These nails are beautiful but may require slight adjustments for things like typing or pulling on tight jeans.
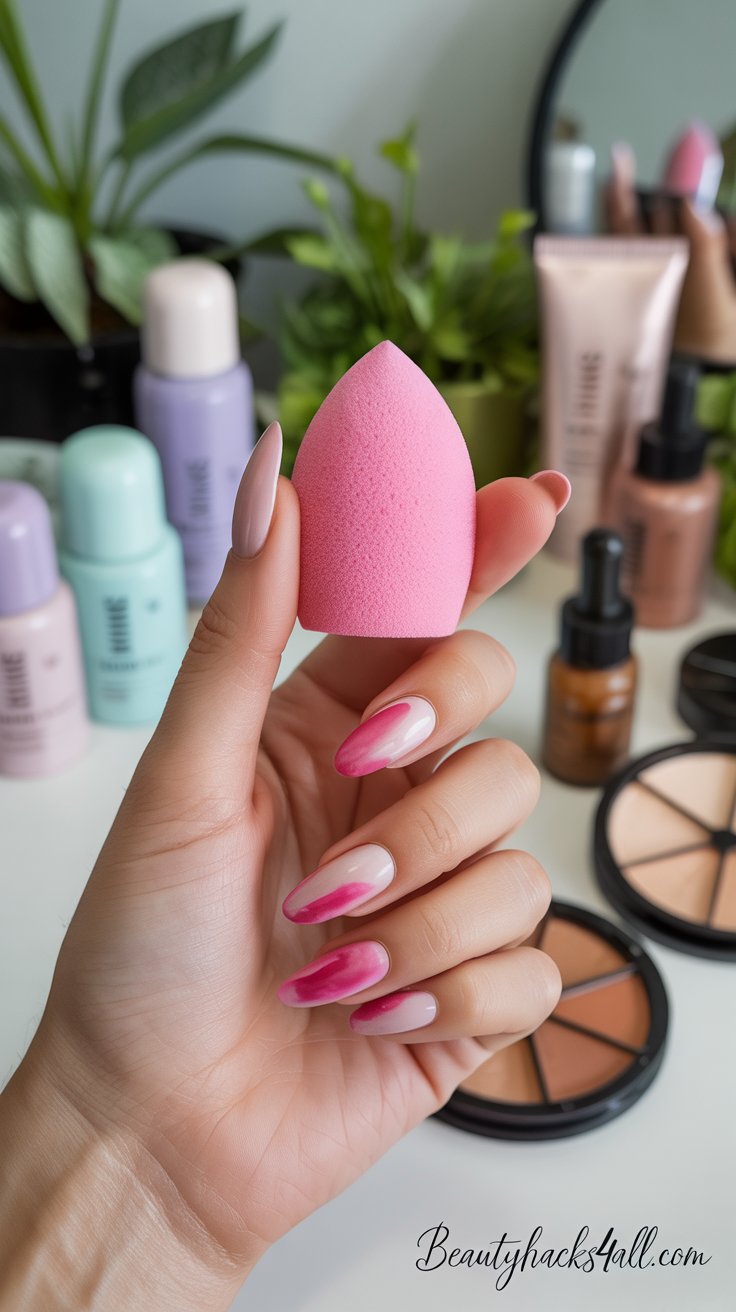
Design #6: Watercolor Rose Wash (Artsy)
Vibe: Free-spirited, artistic, and boho romantic. This look is impressionistic—like a soft-focus photograph or a watercolour painting. It’s effortlessly elegant, subtle, and perfect for the creative soul who prefers a blend of colour over defined lines.
Time: 22 minutes | Cost: $7 / £6 | Wear: 5-7 days
Why It Works for Rose Day: It captures the delicate, fleeting beauty of a rose in an abstract way. It’s romantic without being literal, making it a sophisticated and unique choice for the day.
Shopping List:
-
Polishes: You’ll need 3-4 polishes in the same colour family. For example:
-
A pale pink (almost white)
-
A medium rose
-
A deep berry or mauve
-
A mossy green for leaves
-
-
US (Target): Sinful Colors polishes ($2 each) are perfect for this.
-
UK (Boots): Collection 2-in-1 Nail Polish range (£3 each) offers great shades.
-
Tools: A small, wedge-shaped makeup sponge and a dotting tool or toothpick.
Step-by-Step Artistic Process:
-
The Blank Canvas: Apply two coats of a sheer, off-white or pale pink base. Let it dry. This will act as your “paper” and make the watercolour effect pop.
-
Prepare Your Sponge: Tear a small piece of a makeup sponge (a rough edge creates a better texture than a cut one). On a piece of foil, paint three parallel stripes of your chosen pinks, from lightest to darkest.
-
The Sponging Technique: Gently dab the sponge into the wet polish on the foil. Test the intensity on paper first. Then, with a light, bouncing motion, press the sponge onto your nail. Don’t drag it. Focus the darkest colour (from the sponge’s edge) towards one area (like the nail tip or side) for a natural gradient. Reapply polish to the sponge for each nail. The result should be a soft, mottled, ethereal blend of pinks.
-
Adding Floral Details: Once the sponged base is dry, use your dotting tool.
-
For roses: Create small, loose clusters of 3-4 dots in a darker rose shade, slightly overlapping.
-
For leaves: Dip your tool in the green polish and make small, simple comma shapes or tiny “V”s next to your rose dots.
-
-
The Finishing Wash: Apply a sheer, glossy top coat. For an even more authentic watercolour look, a matte top coat will make the colours look like they’ve been absorbed into the “paper” of your nail.
Pro-Tips for the Perfect Wash:
-
Embrace Imperfection: The beauty of this design is in its randomness. Uneven edges and blended colours are desirable.
-
Work Fast: Polish on the sponge dries quickly. Have your nails prepped and work on one hand at a time.
-
Clean-Up is Key: Use a small brush dipped in acetone to clean polish off your cuticles after sponging for a crisp, artistic look.
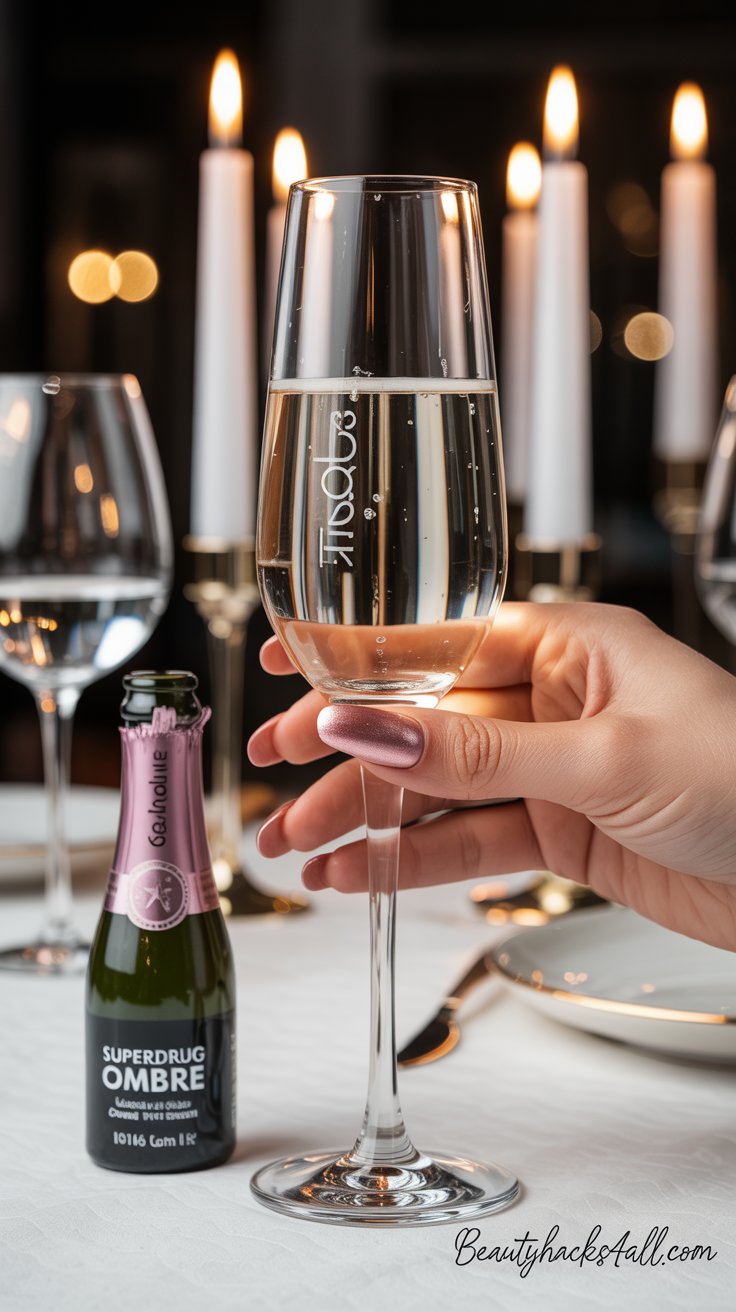
Design #7: Rose Gold Ombre Fade (Sophisticated)
Vibe: Glamorous, luxurious, and dinner-date ready. This is high-impact nail art that says you pay attention to detail. The seamless gradient from soft pink to molten rose gold is modern, chic, and undeniably upscale.
Time: 25 minutes | Cost: $11 / £9 | Wear: 10+ days
Why It Works for Rose Day: It combines the soft romance of pink with the celebratory sparkle of metallic, perfectly embodying the hopeful, glowing feeling of the day. It’s a sunset captured on your nails.
The Method Explained: Unlike a classic polish ombre, this design uses chrome powder over a pink base to create a fade, which gives a more intense, mirror-like effect than glitter polish alone.
Step-by-Step for a Flawless Fade:
-
The Pink Foundation: Apply two even coats of a creamy, medium pink polish. A slightly lighter pink will make the chrome pop more dramatically. Let it dry completely. Any tackiness will ruin the chrome application.
-
The Gradient Base (Critical Step): Apply a no-wipe gel top coat (if using gel) or a very sticky, slightly tacky regular top coat (like Orly Sec ‘N Dry) to one nail at a time. Do not let it dry.
-
Sponge Application for Gradient:
-
Take a small makeup sponge. Using an eyeshadow applicator or a silicone tool, rub a generous amount of rose gold chrome powder onto one edge of the sponge.
-
Immediately, while the top coat is still wet, gently stipple and press the powdered edge of the sponge onto the tip of your nail. Use a lighter touch as you move up the nail, creating a dense chrome tip that softly fades into the pink base near the cuticle. Re-powder the sponge for each nail.
-
-
The Mirror Seal: Once you have the gradient you love, apply a final, floating layer of no-wipe top coat (for gel) or a high-shine quick-dry top coat over the entire nail. This seals the powder, prevents tarnishing, and creates a smooth, glassy finish.
Product Picks:
-
US Chrome Kit: Beetles Rose Gold Chrome Nail Powder Kit (Amazon, $8).
-
UK Chrome Kit: Superdrug Chrome Nail Effect Powder (£9).
Pro-Tips for Ombre Perfection:
-
Patience with the Base: A completely dry pink base is non-negotiable. Rushing will cause the polish to lift.
-
The “Sticky” Zone: The top coat must be in the perfect “tacky” state—not wet, not dry. Practice on a fake nail first.
-
Blend with a Brush: For a more precise fade, you can use a small, clean eyeshadow brush to buff the chrome powder onto the nail, concentrating the colour at the tip.
Design #8: Heart + Rose Combo (Classic)
Vibe: The timeless Valentine’s staple. This is joyful, recognisable, and full of heartfelt sentiment. It’s for the traditionalist who loves the iconic symbols of the season.
Time: 18 minutes | Cost: $5 / £4 | Wear: 5-7 days
Why It Works for Rose Day: It directly celebrates the dual symbols of Valentine’s Week: the giving of roses and the sharing of love (hearts). It’s communicative, charming, and universally adored.
Dotting Tool Masterclass: This design proves you don’t need to be an artist. A dotting tool (or bobby pin/ toothpick) is your best friend.

Step-by-Step for Picture-Perfect Symbols:
-
Clean Background: Apply two coats of a soft, ballet pink or neutral nude polish. Let dry.
-
Creating the Perfect Mini Heart:
-
Dip your dotting tool into red or deep pink polish.
-
Place two dots side-by-side, touching each other.
-
Immediately, using the same tool (wipe it clean if needed), drag a tiny line of polish from the bottom center point where the two dots meet, pulling it down into a slight “V” shape. This connects the dots and forms the heart’s point. Practice on paper first!
-
-
Creating the Simple Dot Rose:
-
Using a pink polish, place 5-6 dots in a tight, circular cluster. This is the rosebud centre.
-
Using a lighter or darker shade, place 4-5 larger dots in an outer circle around the bud, slightly overlapping. This creates the outer petals.
-
-
Composition: Alternate hearts and roses across your nails, or place a small heart next to a rose on an accent nail. Add tiny green leaf dots (two dots placed in a “V”) for extra detail.
-
Seal the Art: A glossy top coat will make your simple dots look like elegant enamel.
Pro-Tips for Neat Dots:
-
Polish Consistency: If your polish is too thick, dots will be globby. Too thin, and they’ll run. Add a few drops of polish thinner if needed.
-
Wipe the Tool: Wipe the dotting tool on the bottle neck after each dip to control the size of the dot.
-
Start Small: Begin with smaller dots—you can always layer another dot on top to make it bigger.
Design #9: Sugar Rose Petals (Textured)
Vibe: Sparkly and 3D without using charms. This look is like having crushed rose quartz or pink sugar crystals on your nails. It’s whimsical, tactile, and catches the light from every angle.
Time: 20 minutes | Cost: $9 / £7 | Wear: 6-8 days
Why It Works for Rose Day: It offers a fairy-tale, fantastical take on the rose theme. The texture is reminiscent of glittering frost on petals or the crystalline structure of a gemstone, adding a magical dimension to your look.
Shopping List:
-
For the Texture: You need a textured polish or a “sugar effect” top coat.
-
US: Sally Hansen Sugar Coat ($5) or OPI Liquid Sand ($10) in a pink shade.
-
UK: Barry M Matte Textured Effect (£5) or Nails Inc. Sparkle Like A Diamond (£10).
-
-
For the Petal Definition: A creamy pink or red polish for drawing petals.

Step-by-Step to Build Texture:
-
Base Layer: Apply one coat of your textured polish as a full base. Let it dry completely. This creates a gritty, sparkly canvas.
-
Defining the Petals: Using a thin nail art brush or the polish brush itself (wipe most of it off), carefully draw simple petal shapes (like teardrops or commas) onto the textured base. You don’t need to be perfect—the texture will blend the edges beautifully. Create a rose by drawing 4-5 petals in a circular pattern. Do this on 2-3 accent nails.
-
Building Dimension: For a more 3D effect, while the petal polish is still wet, you can sprinkle a matching loose glitter onto the petals or dab on a tiny bit more textured polish with a dotting tool.
-
The Strategic Top Coat: Here’s the secret: DO NOT coat the entire nail in glossy top coat. It will ruin the texture. Instead, use a tiny brush to apply a drop of top coat only to the centre of your drawn roses or just to the petal tips. This creates a varied, dewy texture that mimics real petals.
Pro-Tips for Textured Mastery:
-
Embrace the Grit: The charm is in the rough feel. Let go of the desire for a smooth finish.
-
Removal Warning: Textured polishes can be stubborn. Use the foil method with acetone for clean removal.
-
Colour Play: Try a nude textured base with burgundy petals for a dramatic, romantic contrast.
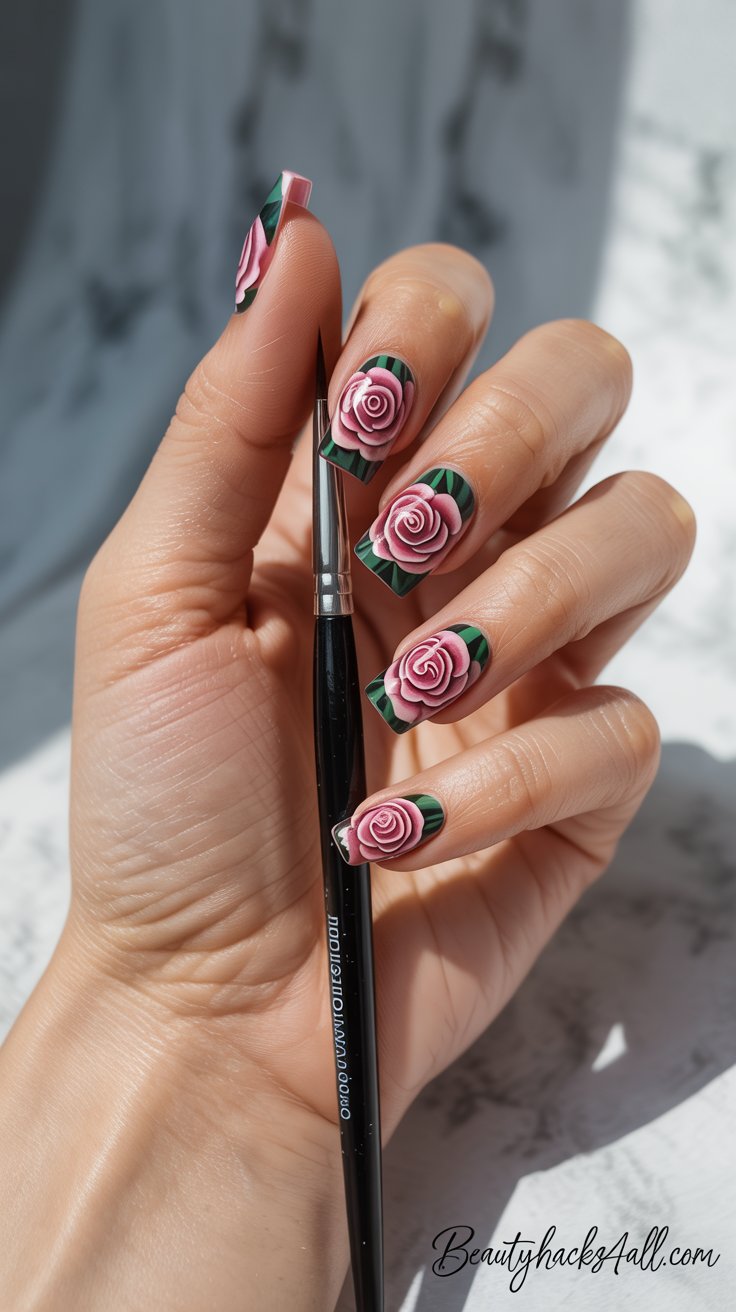
Design #10: Full Bloom Roses (Advanced)
Vibe: For the nail art connoisseur and show-stopper. This is the pinnacle of Rose Day nail art—a miniature painting on each nail. It requires a steady hand and patience but offers unparalleled, breathtaking results.
Time: 35 minutes | Cost: $12 / £10 | Wear: 7+ days (when sealed properly)
Why It Works for Rose Day: It is a true dedication to the craft and the theme. It shows effort, artistry, and a deep appreciation for the beauty of a rose in full bloom. It’s a wearable masterpiece.
Guidance for the Artistic Journey:
1. Gather the Right Tools:
-
Fine Liner Brushes: A detail brush with just a few bristles is essential. Look for nail art brush sets on Amazon ($6).
-
Quality Polishes: You need a creamy, opaque white for the base and highly pigmented polishes in at least three shades: a light pink, a dark pink/red, and a green. Thin, watery polishes won’t work.
-
A Magnifying Lamp (Optional but Helpful): Good lighting and magnification are game-changers.
2. The Step-by-Step Painting Process:
-
Base: Apply two flawless coats of white or off-white polish. This makes your rose colours vibrant.
-
Reference is Key: Have a picture of a simple rose illustration open on your phone. Don’t try to paint from memory.
-
Start with Shapes: Using your lightest pink on the fine liner brush, practice painting loose “C” and “U” shapes on a piece of paper. These are your petal foundations.
-
Build the Rose: On your nail, paint 3-4 of these “C” shapes in a circle to form the inner bud. Then, paint larger, more open “C” shapes around them for the outer petals. Overlap them slightly.
-
Add Depth: While the first colour is still slightly tacky, use your darker pink to add shadow lines at the base of some petals and in the very centre.
-
Leaves and Stems: Use the green to paint simple, slender leaves—just two curved lines meeting at a point. Add tiny thorns with a dot and a drag of the brush.
3. The Reward & Final Seal:
The first attempt might be frustrating, but the reward is immense. Once your design is dry, apply a thick, glossy top coat with a steady hand to seal in your art, smooth any brushstrokes, and give it a professional, lacquered finish. The sense of accomplishment when you look down at your own hand-painted garden is unparalleled.
Pro-Advice:
-
Practice on a Silicone Mat: Amazon sells nail art practice mats. Paint 50 roses before you touch your nails.
-
Thinner is Your Friend: Use nail polish thinner (not acetone) to get your polish to the perfect painting consistency.
-
Breathe and Anchor: Rest both elbows on the table, anchor your painting hand against your other hand, and hold your breath for each delicate stroke.
Complete Shopping Lists & Budget Breakdown
You don’t need a full salon rack to create these looks. Here’s how to build a versatile Rose Day nail kit on a budget.
🇺🇸 US Starter Kit (Total ~$25 at Walmart/Ulta):
-
Sally Hansen Complete Salon Manicure Kit (often includes a base & top coat) – $8
-
Essie Nail Polish in Rosewater Kiss and Blanc – $10
-
Seche Vite Dry Fast Top Coat – $7
🇬🇧 UK Starter Kit (Total ~£18 at Boots/Superdrug):
-
Barry M Gelly Hi-Shine Set (often includes a pink, white, and top coat) – £8
-
Collection 2-in-1 Nail Polish in Romantic Rose – £5
-
Models Own Hypergel Top Coat – £5
Amazon Add-Ons for Both Countries:
-
Nail Art Dotting Tools – $6 / £5
-
Rose Gold Chrome Powder Kit – $10 / £8
-
Assorted 3D Rose Charm Pack (100+ pieces) – $5 / £4
Outfit + Photo Pairing Guide
Your nails are the final accessory. Pair them intentionally for a cohesive look that photographs beautifully.

-
Negative Space Nails: Pair with white jeans and a pink crewneck sweater. The clean nails complement the minimalist outfit. Best Photo Op: A candid shot holding your morning coffee cup.
-
Rose Gold Chrome Tips: Style with a black slip dress and a denim jacket for edge and shine. Best Photo Op: A mirror selfie framing your hand against the jacket.
-
Micro French Petals: Perfect with an oversized blazer and a mini skirt—sweet with a hint of sophistication. Best Photo Op: Gently holding a single rose between your fingers.
-
Velvet Texture Nails: Ideal for a chunky brown sweater and cream trousers. Best Photo Op: A cozy, clasped-hands shot by a fireplace or with a warm drink.
-
3D Charm Nails: Match with a pink mini dress and white sneakers for a fun, flirty day look. Best Photo Op: A bright, sunny peace sign gesture.
Lighting Hack: For capturing metallic nails, kitchen or window light at 4 PM creates stunning, fiery reflections. For French tips, car selfies provide surprisingly perfect, diffused natural light.
Rose Day Nail FAQs (Real Questions, Answered)

-
“Do chrome nails chip easily at a hands-on job?” Not necessarily! With a robust top coat like Seche Vite or a gel top coat, they can last 7-10 days with normal wear. The powder bonds to the top coat, creating a durable seal.
-
“I’m in the UK—where can I actually find chrome powder?” Superdrug’s own-brand kit is excellent and affordable (£9). Barry M also occasionally releases chrome effect kits.
-
“Are these designs okay for very short nails?” Absolutely YES! In fact, minimalist designs like Negative Space and Micro French look incredibly chic and modern on shorter nail beds.
-
“What’s the best way to remove glitter or chrome nails?” The foil method is your friend. Soak a cotton pad in pure acetone, place it on your nail, and wrap tightly with aluminium foil for 5-7 minutes. It will slide off cleanly.
Your Rose Day Nails Are About to BREAK the Internet
From negative space minimalism to full chrome glamour, these ten designs are your toolkit for a perfect Rose Day. They blend the top Pinterest trends of 2026 with real-world practicality and budget-friendly beauty. Choose the design that matches your vibe, tag your first Rose Day manicure attempt online, and get ready for the “Where did you get these done?!” DMs to roll in.
Remember, Rose Day is the perfect excuse for a nail day. You now have the looks, the product guides, and the timeline. Go forth and make those hands Instagram-famous!
Coming Next: Get ready for Propose Day with stunning gold chrome nail designs!