Hey there, sparkle seekers! If you’ve been scrolling through Instagram or TikTok lately, you’ve seen it: the art of the curated ear. Forget the single, standard lobe piercing of the past. The trend for 2026 is all about personalized, minimalist constellations of tiny studs, delicate hoops, and hidden accents that tell your unique story. This isn’t about loud statements; it’s about feminine, versatile sparkle that works for a college seminar, a day at the office, or a romantic date night.
Imagine soft, 2-5mm gems—think stars, crescent moons, and iridescent pearls—placed intentionally to catch the light just so. They can play peek-a-boo under your hair or take center stage with an elegant updo. For beginners, the beauty is in the low commitment. Standard lobes heal in a breezy 4-8 weeks, while cartilage piercings, though requiring more patience (3-12 months), build a sense of personality and style over time.
This comprehensive guide is your friendly roadmap. We’re covering over 25 aesthetic ideas across every pierceable zone, giving you real-talk pain scales, clear healing timelines, pro jewelry picks, and styling tips for every vibe. From the ever-popular stacked lobes (making up nearly 40% of new piercings) to the rising stars like the conch and flat, we’ll help you map your dream ear without the overwhelm. Ready to curate a look that’s authentically you? Let’s dive in.

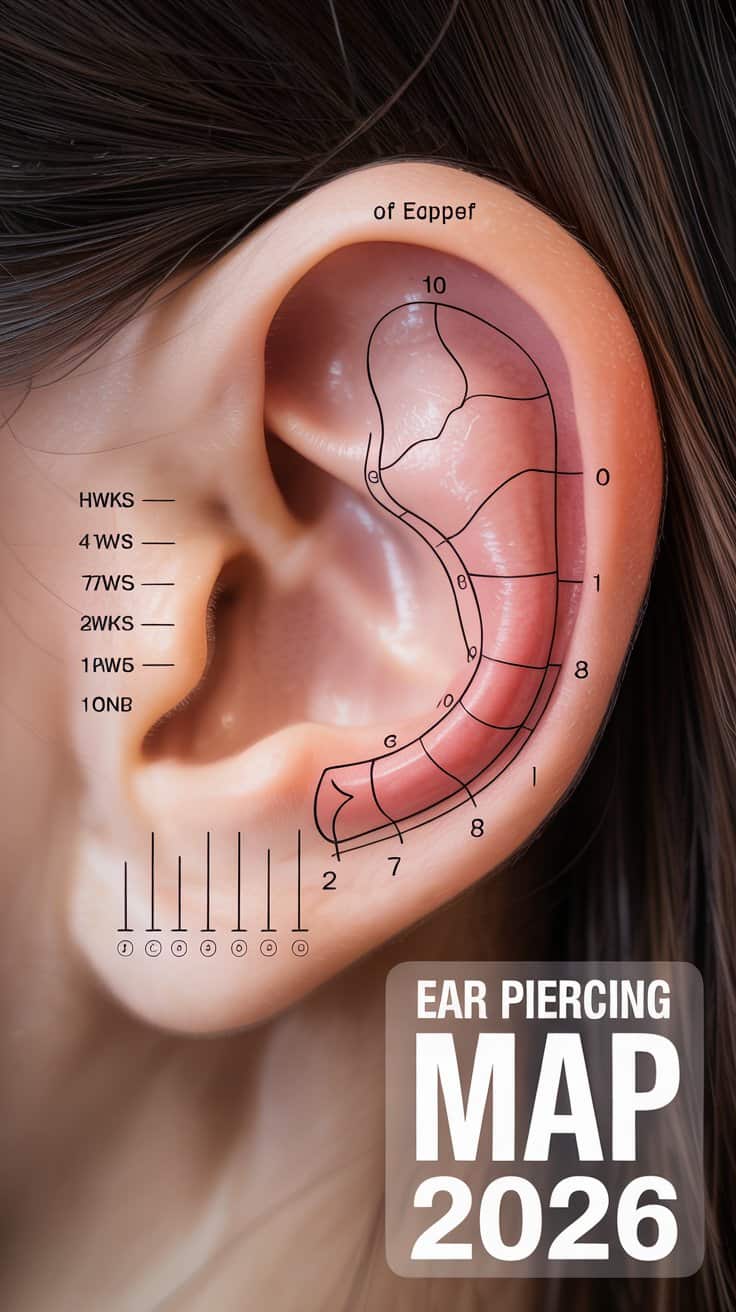
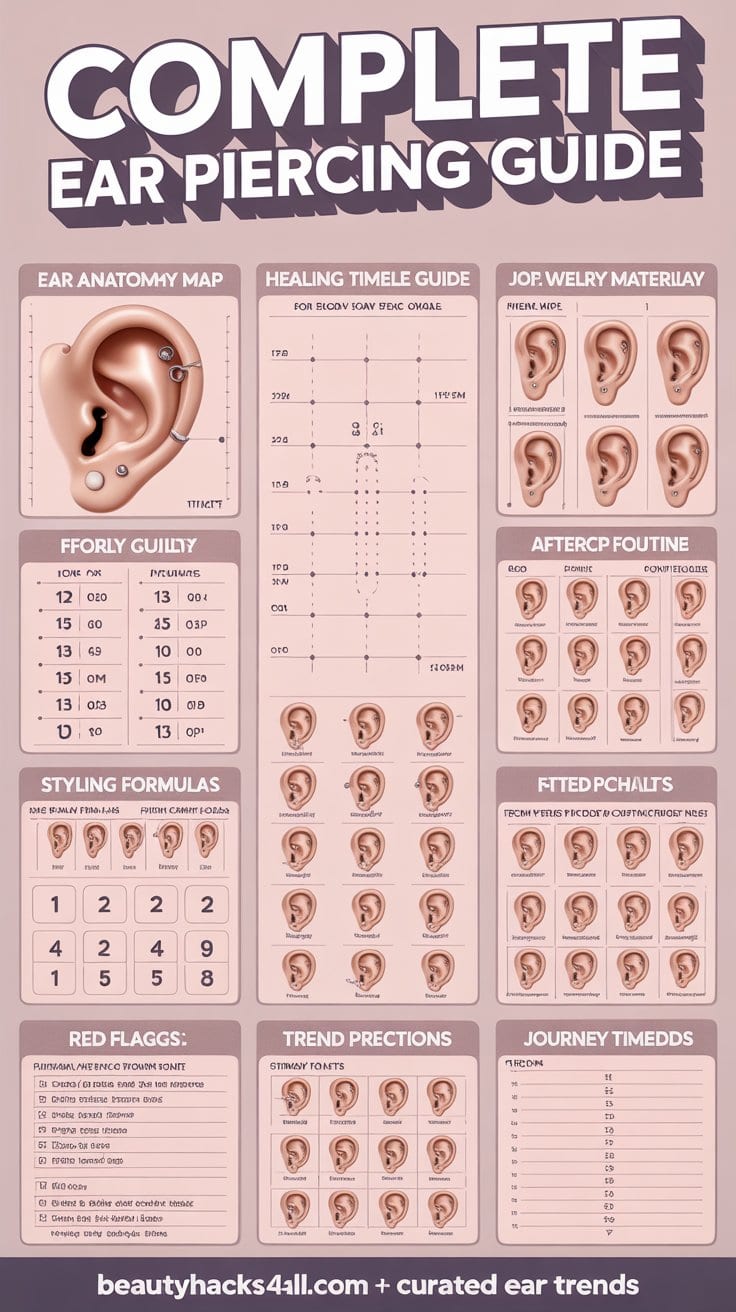
Understanding Your Canvas: A Guide to Pierceable Ear Zones
Before you start pinning inspiration photos, let’s get familiar with the landscape. Your ear is a unique canvas with distinct areas, each offering different aesthetics and healing experiences. The 2026 approach favors intentional “constellation stacks”—dainty, dotted studs that mimic a starry sky—over heavy, crowded clusters. A key thing to remember: pain and healing are dictated by tissue type. Fleshy areas are generally quicker and gentler, while cartilage involves more pressure and longer aftercare.
Check out our previous post-30 Minimalist Tattoo Ideas That’ll Steal Your Heart in 2026
Here’s a breakdown of your prime piercing real estate:
Lobe (First, Second, Third): The soft, fleshy bottom of your ear. This is the universal starting point for a reason. Pain Level: 2/10 (feels like a quick pinch or rubber band snap). Healing Time: 4-8 weeks. It’s the foundation of any curated ear.
Upper Lobe: The slightly firmer area just above the standard lobe. Perfect for creating asymmetry and building vertical stacks. Pain Level: 3/10. Healing Time: 6-10 weeks.
Helix: The outer rim curve of your ear’s cartilage. Incredibly versatile for both studs and the trendy tiny hoops. Pain Level: 5/10 (a sharp, intense pinch with lingering pressure). Healing Time: 6-12 months.
Forward Helix: Located on the cartilage at the very top front of your ear, near your temple. A fantastic spot for a hidden sparkle. Pain Level: 4/10. Healing Time: 3-9 months.
Tragus: The small, thicker bump of cartilage that partially covers your ear canal. It makes for a bold yet minimalist accent. Pain Level: 6/10 (a pronounced “pop” sensation). Healing Time: 2-6 months.
Flat: The flat, broad expanse of cartilage on the inner part of your ear, between the helix rim and the conch. A 2026 favorite for small, decorative studs. Pain Level: 5/10. Healing Time: 6-12 months.
Conch: Named for its shell-like shape, this is the spacious, cup-shaped cartilage in the center of your ear. It’s rapidly overtaking the helix as the go-to cartilage piercing. Pain Level: 6/10 (a deep, pressing sensation). Healing Time: 6-12 months.
Pro Tip: Before your appointment, use a marker (or even a sticker) to play with placement on your ear. Always choose a professional piercer who uses a sterile, single-use needle—it leads to a cleaner puncture and about 70% fewer complications than old-school guns, especially for cartilage. Knowing your map is the first step to building your sparkle stage!
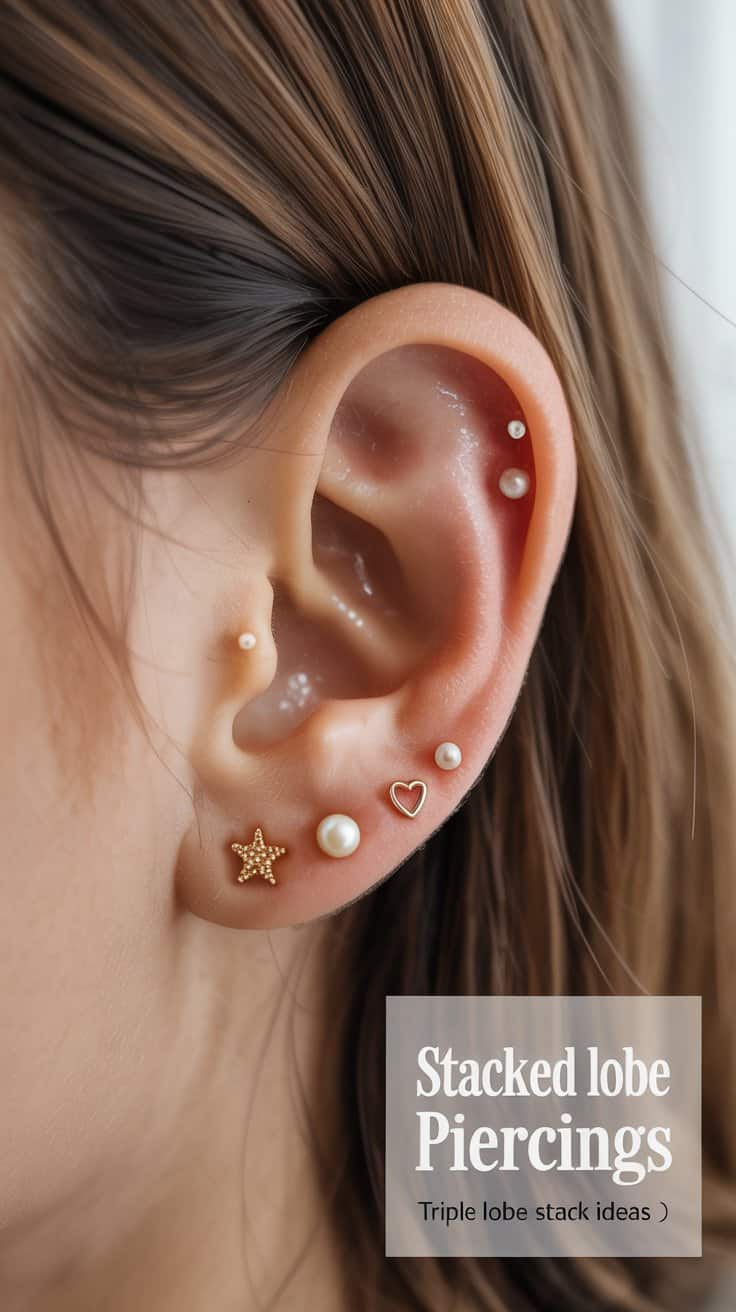
Starting Simple: Tiny Lobe Piercings for a Solid Foundation
The lobe is the undisputed anchor of any great earscape. Its soft, forgiving tissue makes it the perfect, beginner-safe playground for stacking multiple tiny studs. In fact, the “stacked lobe” trend is seeing a huge surge, with many choosing to get two, three, or even four piercings in a vertical or clustered line. It’s the ideal entry point because you can start with one and add more as your confidence grows.
Why are lobes the perfect launchpad? The healing is the fastest on your body (just 1-2 months), the pain is truly minimal, and the styling possibilities are endless. You can mix and match gem shapes—a gold star, a creamy pearl, a tiny heart—to create a look that’s entirely your own.
Popular 2026 Stack Blueprints:
-
The Classic Double: A timeless and professional look. Place a simple 2mm diamond or plain gold stud in your first lobe, and a slightly larger 3mm piece (like a moon or bezel-set crystal) in your second. It’s elegant enough for daily wear.
-
The Asymmetrical Triple: Embrace the “I woke up like this” cool. On one ear, create a vertical line of three mismatched studs (e.g., star, pearl, heart). On the other, keep just a single, beautiful crystal. It’s intentionally imperfect and Pinterest-worthy.
-
The Snakebite Duo: For a touch of edgy minimalism, place two lobe piercings very close together horizontally, mimicking a snakebite pattern. Keep the jewelry small and matching for a subtle, modern effect.
Jewelry & Care: Start with implant-grade titanium or 14k gold labret studs with flat backs—they snag less on hair and clothes. Clean twice daily with sterile saline spray. Try to sleep on your back or use a travel pillow to avoid pressure for the first week. Lobe stacks are more than just piercings; they’re your glow-up gateway, building the confidence to explore further.
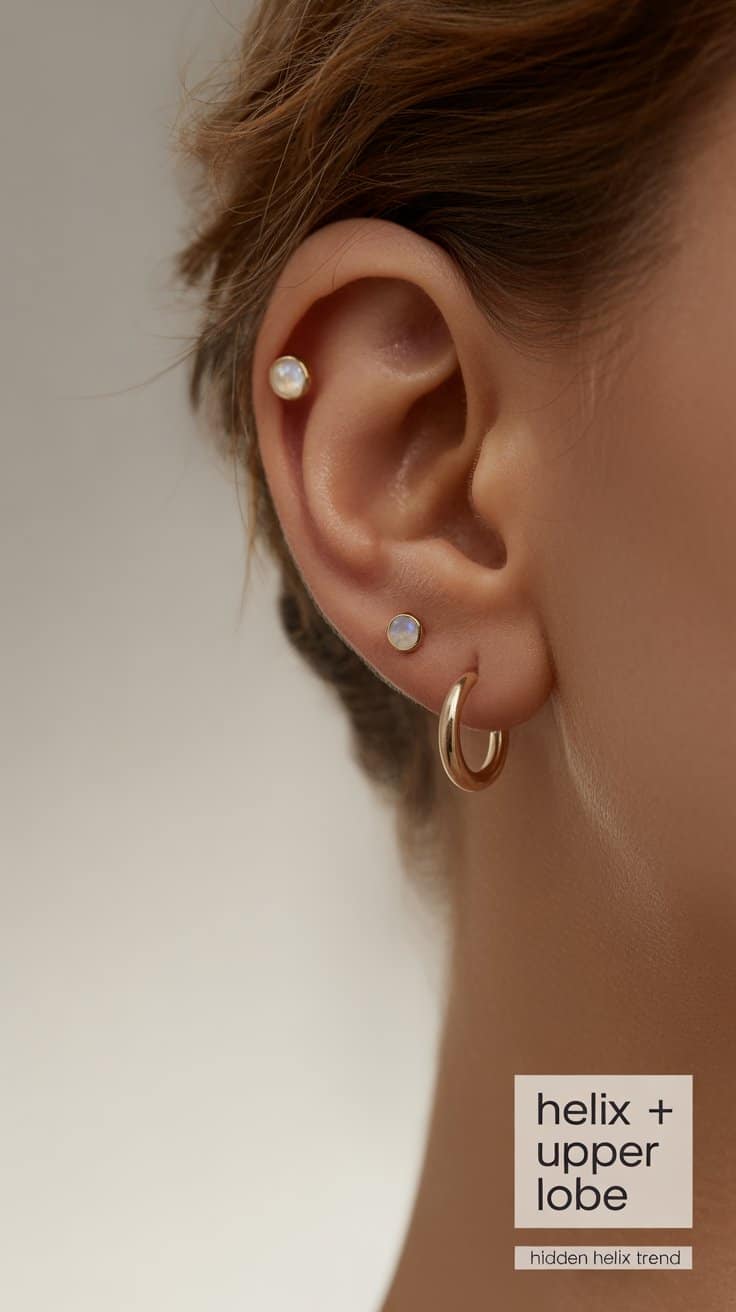
Elevated Everyday Edge: Helix and Upper Lobe Combinations
Once you’ve mastered the lobe, it’s time to add some dimension. Combining a helix piercing with an upper lobe creates an instantly elevated, sophisticated look that’s a hallmark of 2026 style. The “hidden helix” trend—where a tiny stud or micro-hoop sits on the outer curve, revealed only when hair is tucked—is the epitome of quiet luxury.
A helix piercing involves the outer cartilage rim. Expect a deeper pinch than the lobe (around a 4-5/10 on the pain scale) and a longer healing journey of 6 to 12 months. The payoff? A piercing that pairs beautifully with everything and adds an undeniable edge.
Stylish Combination Ideas:
-
The Effortless Starter: Pair a single, tiny 6mm gold hoop in your helix with a single pearl stud in your upper lobe. It’s chic, balanced, and incredibly versatile.
-
The Constellation Vibe: Opt for a double helix (two studs placed vertically on the cartilage rim) paired with a single stud in your standard lobe. This creates a beautiful, dotted line that draws the eye upward.
-
The Curated Cluster: Combine a small curved barbell in the helix with a cluster of two or three mismatched tiny studs in the upper lobe area. This creates a collected, artistic feel.
Smart Healing Tips: If you have short hair, your new helix will be a star. With long hair, be mindful of keeping it clean and untangled. Avoid over-ear headphones for at least the first two weeks, as swelling typically peaks around day three. Applying a clean ice pack (wrapped in a paper towel) for 20-minute intervals can help reduce initial puffiness by up to 50%. A helix piercing is that perfect signature curve that transforms your look from basic to bespoke.
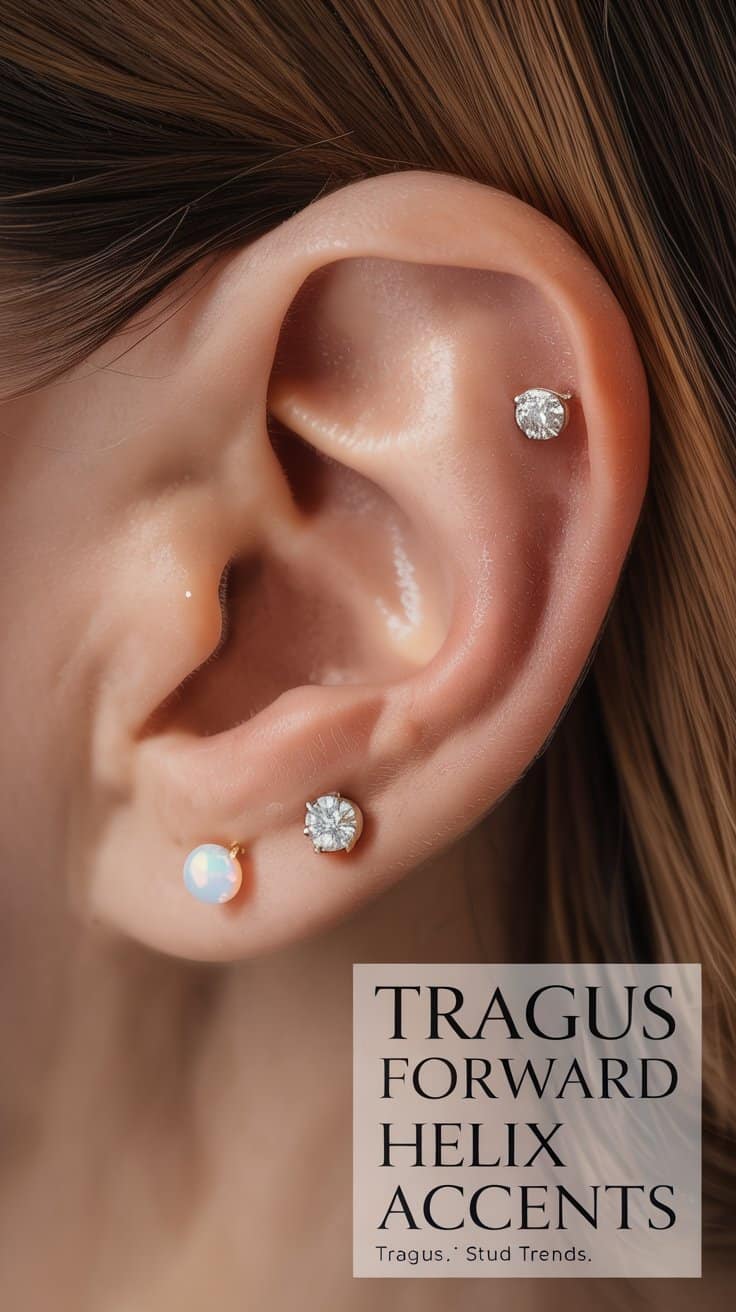
Subtle High-Impact Accents: Tragus and Forward Helix
For maximum sparkle-per-inch, look to the tragus and forward helix. These piercings are small in size but huge on impact, offering a “cool girl curated” vibe that feels intentional and stylish without overwhelming your overall look.
The tragus is that little flap guarding your ear canal. It’s typically pierced with a flat-back labret stud that sits flush against the skin. The sensation is a sharp “pop” (around a 6/10), but it heals relatively quickly for cartilage (2-6 months). The forward helix, perched at the front top of your ear, is slightly less intense (4/10) but requires similar patience (3-9 months). It’s become 2026’s favorite spot for “tucked intrigue.”
Why They Work So Well:
-
Tragus Solo: A single 3-4mm crystal or opal labret stud is stunning on its own. It’s surprisingly phone-friendly once healed and rarely snags.
-
Forward Helix Gem: A tiny stud here acts like a secret sparkling beacon, especially visible in selfies and profile shots.
-
The Connected Look: For the truly curated, a delicate chain can be attached (once fully healed) from a forward helix to a standard helix or from a tragus to a conch, creating a beautiful, flowing line.
Practical Pointers: If you’re a frequent phone user, the tragus is a great choice as it sits out of the way. Cleaning requires extra care—gently clean the front and back without moving the jewelry. Stick with hypoallergenic materials and wait for your piercer’s go-ahead (usually around 6-8 weeks) before even thinking about changing the jewelry. These subtle accents prove that sometimes, the smallest details make the most lasting memories.
2026’s Rising Cartilage Stars: The Flat and Conch
Move over, standard helix. The flat and conch piercings are the new cartilage darlings of 2026, with the conch in particular becoming a modern classic. Flat one offers a beautiful, broad canvas for decorative studs, while the conch is incredibly versatile, looking amazing with either a central stud or a captive bead ring that hugs the curve of your ear.
The flat involves a smooth, steady pressure (5/10), while the conch feels like a deep, intense push (6/10). Both require commitment, with healing times ranging from 6 to 12 months. Their placement in the inner ear makes them less prone to accidental bumps than the helix, but aftercare is still crucial.

Trendy Takes for Your Inspiration:
-
The Boho Whisper: A single 3mm moonstone or opal stud placed centrally on the flat makes a soft, ethereal statement.
-
The Shell Hugger: An 8mm rose gold or yellow gold hoop nestled in the conch is a timeless and elegant look that frames the ear beautifully.
-
The Architectural Bar: A vertical barbell placed in the outer conch, connecting towards the helix, creates a modern, almost industrial feel.
Healing & Styling Smarts: A flat pairs beautifully with a stacked lobe for a balanced look. A conch loves the company of a chain link to a tragus or lobe piercing. To speed healing, consider a warm sea salt soak 2-3 times a week for the first few months to encourage blood flow and cleanse gently.
The number one lifesaver? A piercing pillow or travel pillow with a hole in the center. Never sleep directly on a healing cartilage piercing. These mid-ear gems are the curated core of the 2026 aesthetic—they turn heads whether tucked behind hair or proudly on display.
Building Your Signature: The Art of the Curated Earscape
This is where the magic happens. An “earscape” is the artful composition of multiple piercings (typically 4-8) into a cohesive, personal symphony. It’s not about getting everything at once; it’s a gradual, evolving collection. The 2026 blueprint often involves a foundation of 3 lobe piercings, 2-3 upper/cartilage pieces (like helix or flat), and one standout accent (like a conch or tragus).
The key is spacing and patience. Work with your piercer to map placements at least 1cm apart to allow for swelling and proper healing. Always let one piercing heal significantly (especially cartilages) before adding another nearby.

Signature Style Frameworks:
-
The Office-Curated: Triple lobe (tiny, matching studs) + a single small helix hoop + a tiny forward helix stud. Stick to one metal tone (all gold or all silver) for a polished, professional look.
-
The Festival Constellation: A clustered lobe group + a double flat with star and moon studs + a conch hoop. This is where mixed metals and sparkly gems can really shine.
-
The Romantic Asymmetry: Go for a full, delicate stack on one ear (lobes, helix, flat) and keep the other dramatically minimal with just a single pearl lobe and a tiny tragus stud.
Choose a color palette that complements your style: rose gold for warmth, silver/white gold for a cool tone, and pearls for vintage romance. Document your journey with monthly selfies—it’s incredibly rewarding to see your evolution. Remember, a curated ear is like a living tattoo collection; start safe, plan intentionally, and let your sparkle become iconic.
The Real Deal on Pain: Straight Talk from 2026 Piercers
Let’s be honest: the fear of the pinch holds many people back. But here’s the universal truth from piercers: the anticipation is almost always worse than the reality. The actual piercing moment is incredibly brief—anywhere from 5 to 30 seconds of sensation.

-
Lobes: A quick, sharp pinch (2/10) that fades to a dull ache almost immediately.
-
Cartilage (Helix/Flat): A more intense pinch followed by a hot, pressing sensation (5/10).
-
Tragus/Conch: A pronounced “pop” or deep pressure that can be startling but is over in a flash (6/10).
Your Beat-the-Pain Protocol:
-
Fuel Up: Eat a solid meal with protein and drink water about an hour before your appointment. This stabilizes your blood sugar and prevents lightheadedness.
-
Breathe: Your piercer will guide you. Typically, take a deep breath in, and exhale slowly and steadily as the needle goes through. This relaxes your muscles.
-
Distract: Bring headphones and play a hype song. Focusing on the music can dramatically shift your attention.
-
Numb (Optional): Ask your piercer about a topical numbing cream. While not always recommended for all piercings, it can take the edge off for some, reducing initial sensation by about 30%.
Post-piercing, you can expect a throbbing ache for up to 48 hours. Over-the-counter ibuprofen can help with inflammation and pain. Avoid alcohol and aspirin before your appointment, as they can thin your blood. Everyone’s tolerance is different, but many find that if they can handle a tattoo, a piercing is a walk in the park. The fresh badge of honor feeling fades fast; the confidence boost is forever.
The Non-Negotiable: Your Complete Aftercare Blueprint
Your piercing’s future beauty is 90% determined by your aftercare consistency. Lobes are low-maintenance, but cartilage demands respect. General redness and mild swelling for the first week are normal. Signs of real trouble (excessive pus, throbbing heat, or red streaks) mean it’s time to see a doctor.
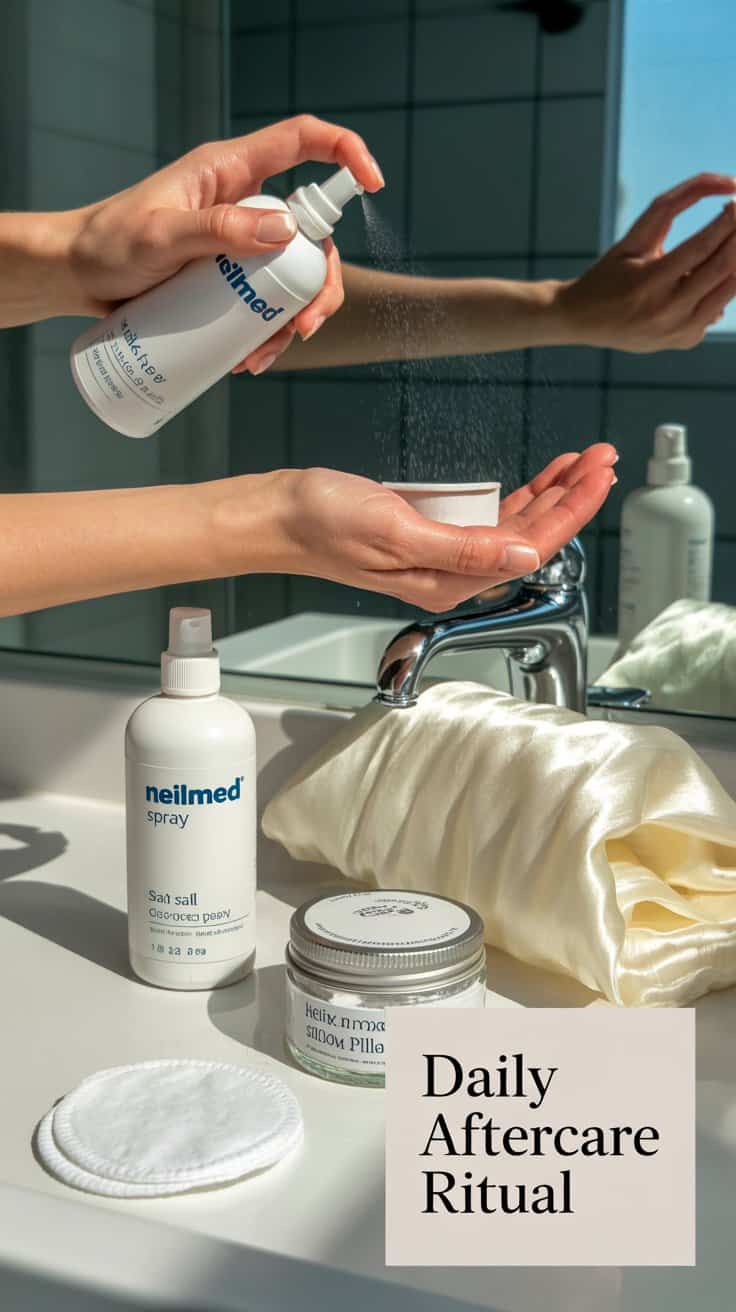
The Daily 5-Minute Ritual (For the First 3+ Months):
-
Wash Your Hands. Every single time.
-
Spray. Apply sterile saline solution (like NeilMed Piercing Aftercare) directly to the front and back of the piercing. No need to soak it.
-
Pat Dry. Gently use a clean, disposable paper towel. Don’t use cloth towels, which harbor bacteria.
-
LITHA. This is the golden rule: Leave It The Hell Alone. Don’t twist, push, or pick at the jewelry. Let any crusties fall off naturally during cleaning or in the shower.
-
Protect It. Avoid submerging it in pools, hot tubs, or lakes for at least 2 months. Keep hair products, makeup, and perfume away from the area.
Milestone Boosters & Troubleshooting:
-
Week 2-3: If the initial swelling has gone down and the jewelry feels long, consult your piercer for a downsize. This prevents snagging.
-
Month 1+: For persistent irritation bumps, a warm sea salt soak 2-3x a week can help. A tiny dab of diluted tea tree oil (only on bumps, not the piercing hole) is a popular remedy, but patch test first.
-
Permanent Upgrade: Invest in a silk pillowcase. It creates less friction and is gentler on all your piercings and skin.
Healing is a marathon, not a sprint. Track your progress with photos and celebrate small milestones. Patience is the ultimate price for permanent, pretty adornment.
From Day to Night: Styling Your Stack for Every Vibe
One of the best parts of tiny piercings is their chameleon-like ability to adapt. Your curated ear can be a professional secret or your main accessory, depending on how you style it.

-
For the Office: Keep it classic with simple studs in your lobes and upper lobe. A small, plain hoop in the helix still looks professional and polished. The goal is subtle shine, not distraction.
-
Casual Weekend: This is where mixed metals and shapes play. Pair your favorite tiny hoops (huggies are perfect) with a few constellation-like studs on your flat or helix. It’s effortless with denim and a tee.
-
Night Out/Statement Moment: Pull your hair up! A sleek bun or pony tail showcases your entire earscape. Add a bold piece like a chain connecting your conch to your lobe, or swap in a few sparkly CZ studs. A red lip paired with a glimmering conch hoop is a powerful combo.
Pro Styling Hacks:
-
During the initial healing phase, use bobby pins or a decorative clip to keep hair off a fresh cartilage piercing on one side.
-
Match your earring metal to your necklace and rings for a put-together look—though 2026 fully embraces tastefully mixed metals.
-
Your ear stack is your secret style weapon. Let it reflect your mood.
Red Flags and Your Piercer Checklist
Your safety is paramount. Pause your plans if you: have a history of keloids (raised, excessive scarring), have an active eczema or psoriasis flare on your ears, are on heavy blood thinners, or are feeling sick. If pregnant, many piercers recommend waiting until after the first trimester and always consulting with your doctor first.
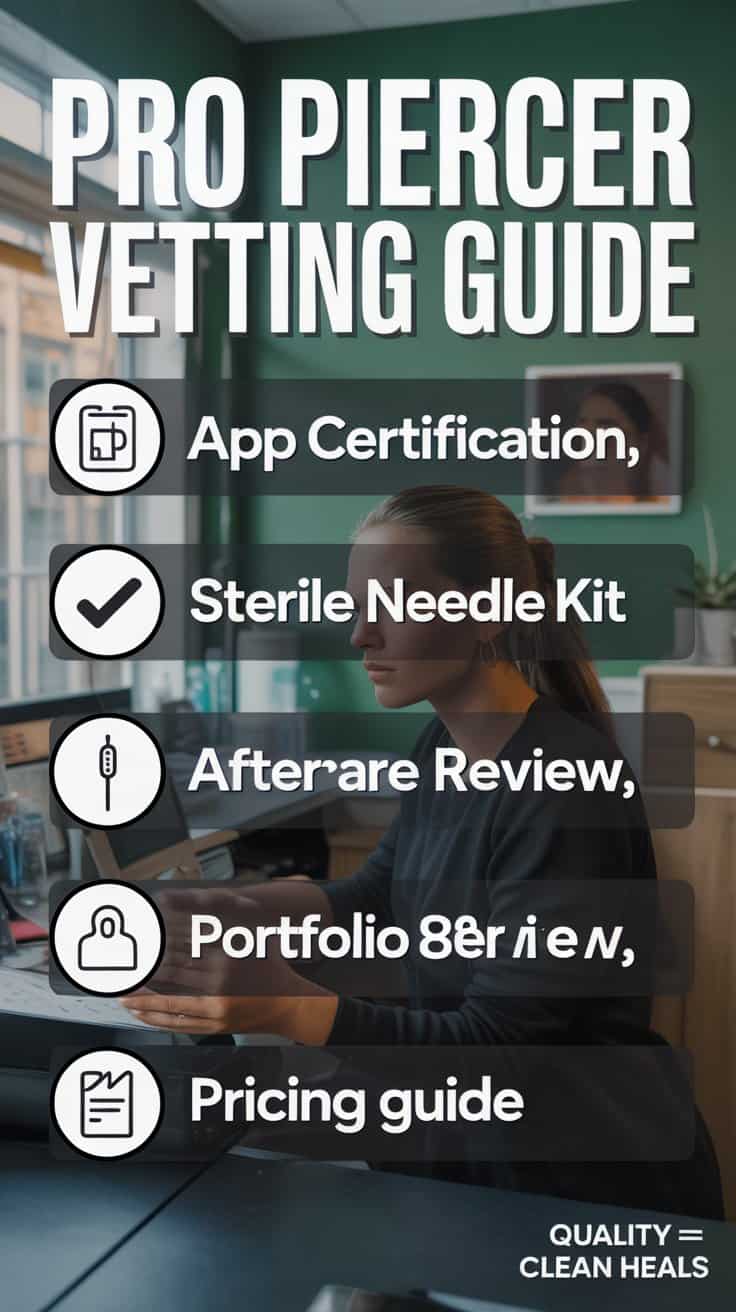
Choosing your piercer is the most important decision.
Here’s your vetting checklist:
-
Credentials & Experience: Look for a piercer with 5+ years of experience, preferably affiliated with the Association of Professional Piercers (APP) or similar reputable organizations.
-
Studio Hygiene: The studio should be impeccably clean, like a dentist’s office. All tools should be autoclave-sterilized and single-use needles opened in front of you.
-
The Consultation: A good piercer will spend time discussing placement, jewelry options, and aftercare. They should provide a detailed aftercare sheet.
-
Portfolio & Reviews: Check their Instagram portfolio for healed work and placement aesthetics. Read Google and Yelp reviews.
-
Pricing: Expect to pay for quality. Individual piercings can range from $40-$100+ (including basic jewelry). A full curated ear project with high-quality jewelry can be an investment of $250+. Remember, with piercings, you often get what you pay for. Rushed, cheap choices often lead to regret.
2026 Jewelry Trends: What to Shop For Your Healing & Healed Piercings
The “dainty” trend is still reigning supreme. Think 2-6mm studs, micro-hoops, and delicate chains. For fresh piercings, the material is non-negotiable: implant-grade titanium (hypoallergenic) or 14k/18k gold. Once healed, the world opens up.
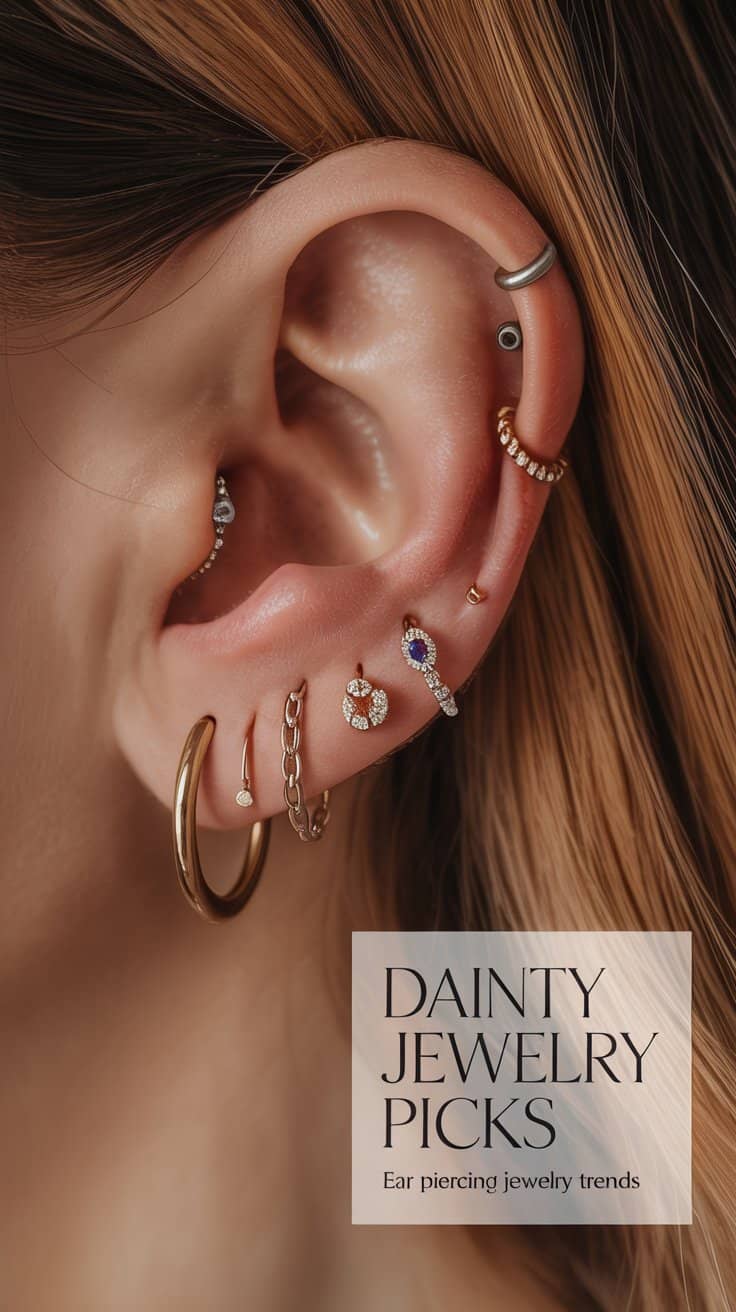
2026’s Hottest Jewelry Picks:
-
Huggies: Ultra-tiny hoops that “hug” your helix, lobe, or tragus. Perfect for a seamless look.
-
Threadless Labrets: The industry standard for flat-back studs. The decorative top simply pushes into the post, allowing for easy, painless top changes.
-
Connector Chains: Delicate chains that link two separate piercings (e.g., lobe to conch, helix to flat). They instantly create a curated, high-fashion feel.
-
Personalized Accents: Tiny birthstone studs, initial charms, or astrological symbols to make your constellation truly yours.
Budgeting & Brands: For your initial piercing, the cost is part of the service. For later swaps, quality brands like BVLA, Junipurr, Industrial Strength, and Body Gems are top-tier. More accessible brands like Studs, Lobella, and Invictus offer great options. Budget anywhere from $20 for a simple post to several hundred for a fine jewelry piece. The mantra: stack smart with quality pieces that will let you sparkle forever.
Buy the Best Quality studs only on Amazon.
Your Curated Journey Awaits
Building your dream ear is a beautiful, personal journey—a decade’s worth of stories told in tiny sparks of metal and gem. It starts with a single, simple lobe piercing and can crescendo into a full, artistic conch statement. The process teaches patience, self-expression, and the joy of intentional adornment.
Remember, the brief pinch passes. The occasional aftercare hassle fades. What remains is a unique part of your personality, a curated legacy that moves with you into 2026 and beyond. So, pin this blueprint, book that consultation with a reputable piercer, and start glowing on your own terms.
We’d love to hear from you! What’s your dream piercing stack? Which idea from this guide are you most excited about? Share your thoughts and inspire our community of sparkle seekers!